What are Artisan Keycaps?
What are Artisan Keycaps?
Editor: rmendis
Last Updated: Dec 27, 2020
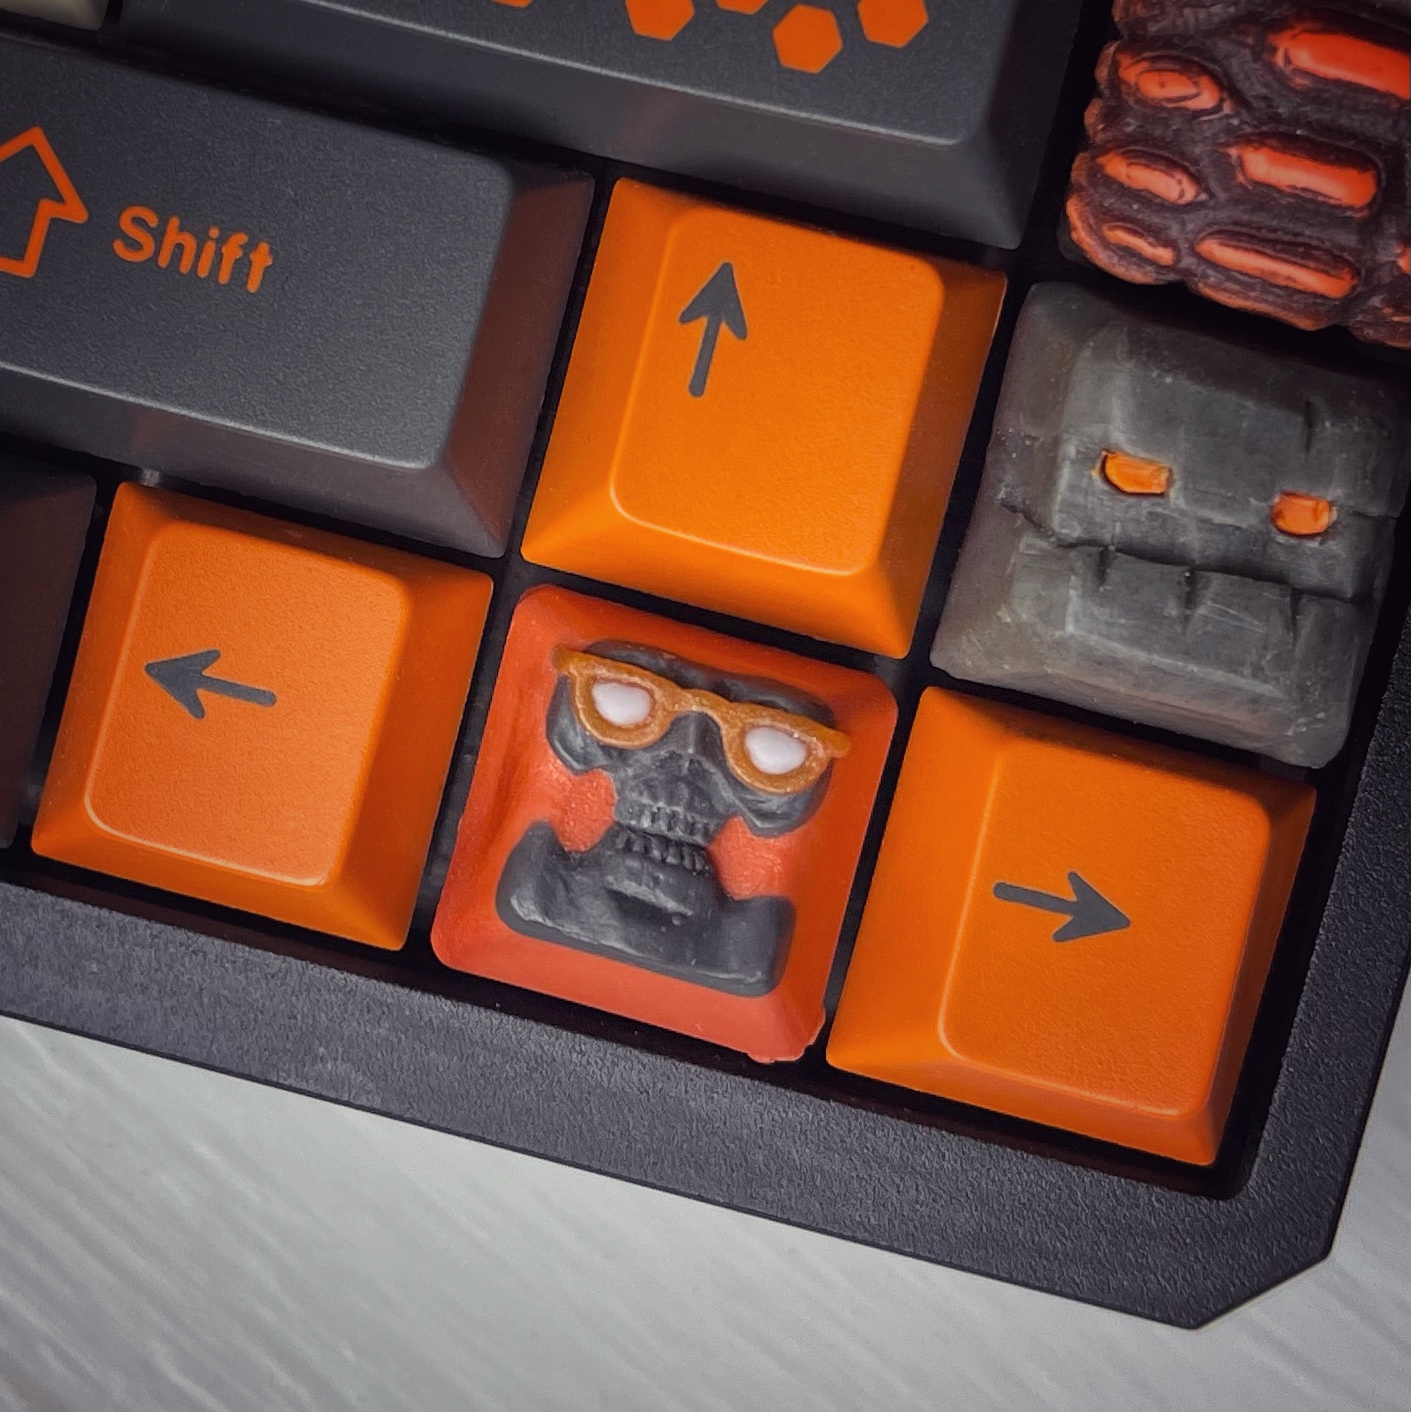
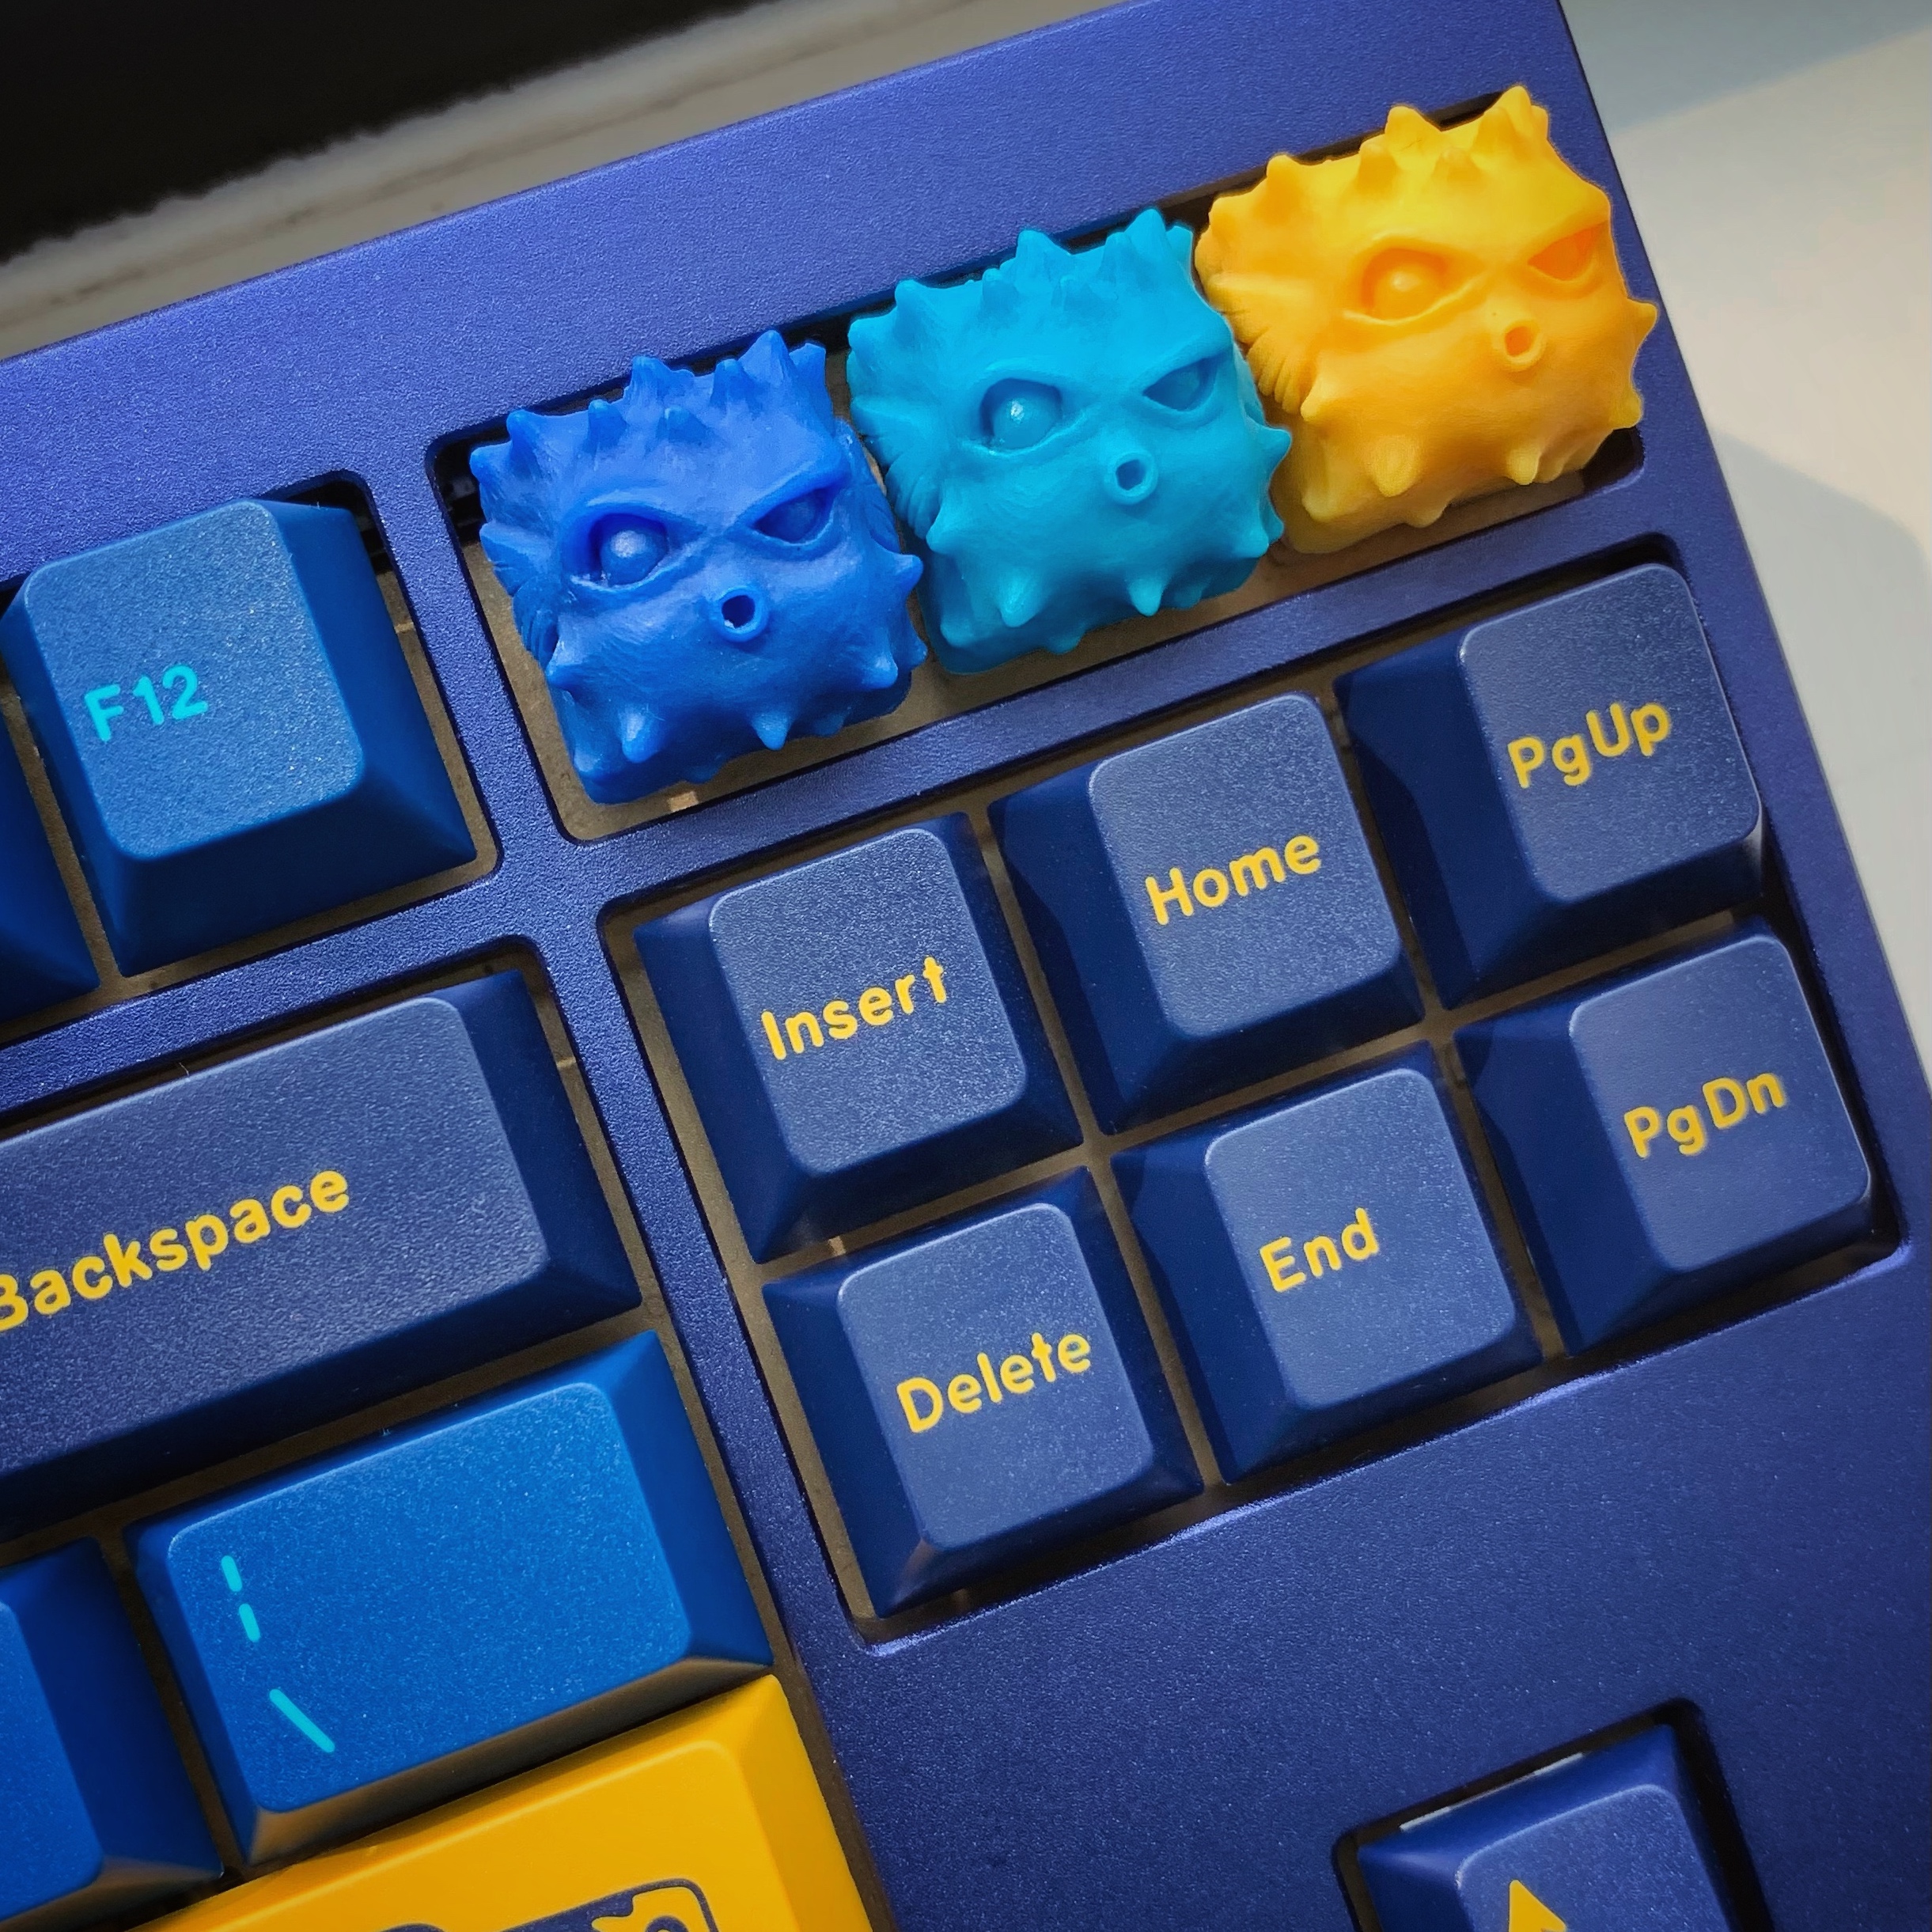
An artisan keycap is a miniature sculpt, typically hand made, that fits on the switch of a mechanical keyboard to add some flair. Keycaps are available in many different shapes and sizes, and can be made using a variety of materials and methods. The first known artisan keycaps appeared circa late 2009 or early 2010, and spawned a niche community of part-time indie makers and supportive collectors, initially selling and trading on Geekhack.
Makers now number in the hundreds, with several of them producing keycaps full-time to sell to thousands of hobbyists around the globe. Platforms have grown in number and scale since the early days, with a vibrant community posting hundreds of retail and aftermarket keycap listings each week. In this guide, we will cover the fundamentals of artisan keycaps, the various stem and profile types, how they are typically made, and where you can learn more about the makers and their sculpts.
Common Keycap Profiles

Cherry

OEM

DSA

KAM

KAT

MT3

SA
Artisan Keycap Profiles and Stems
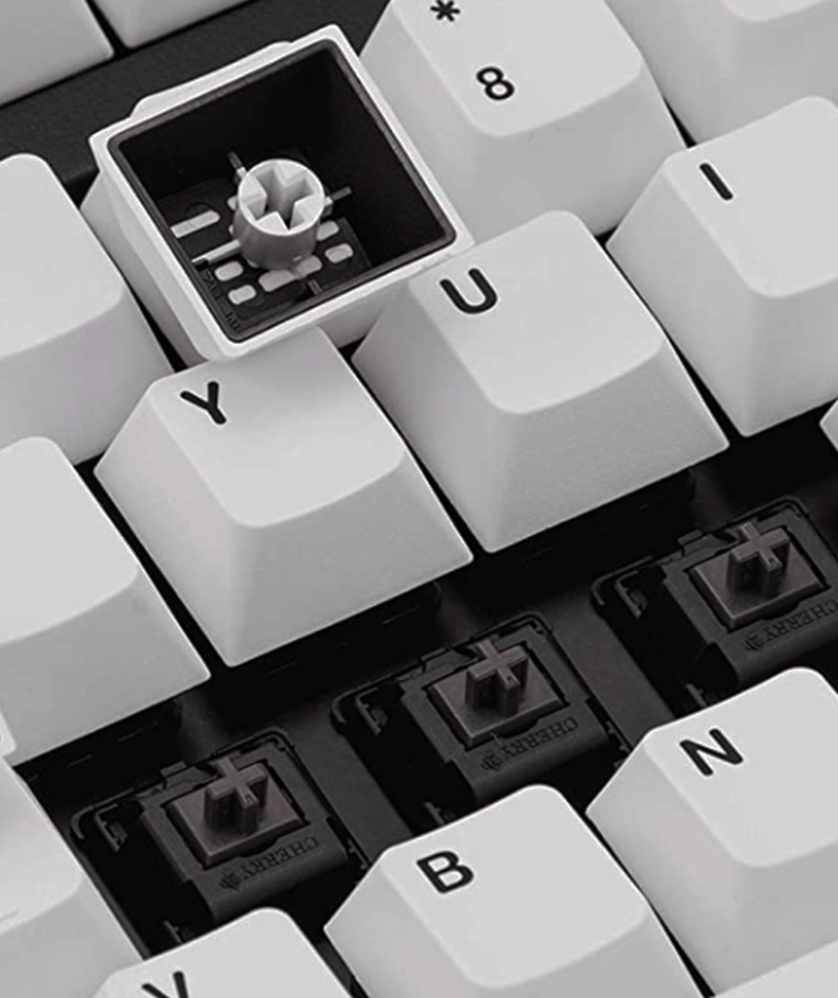
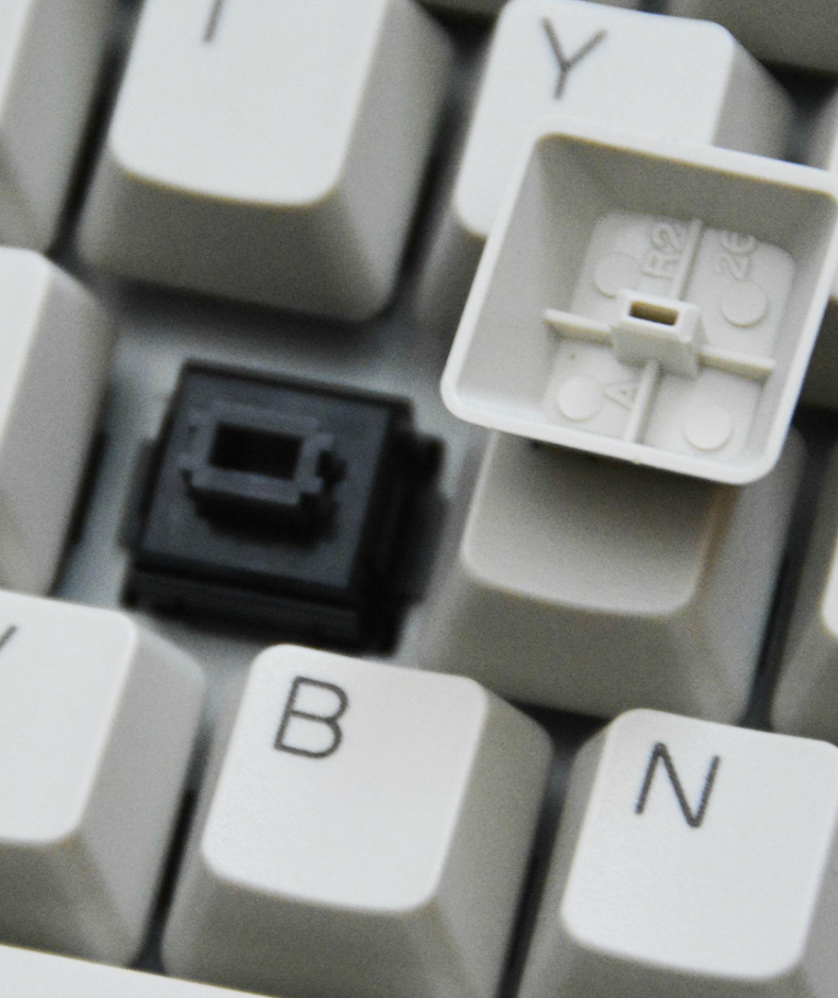
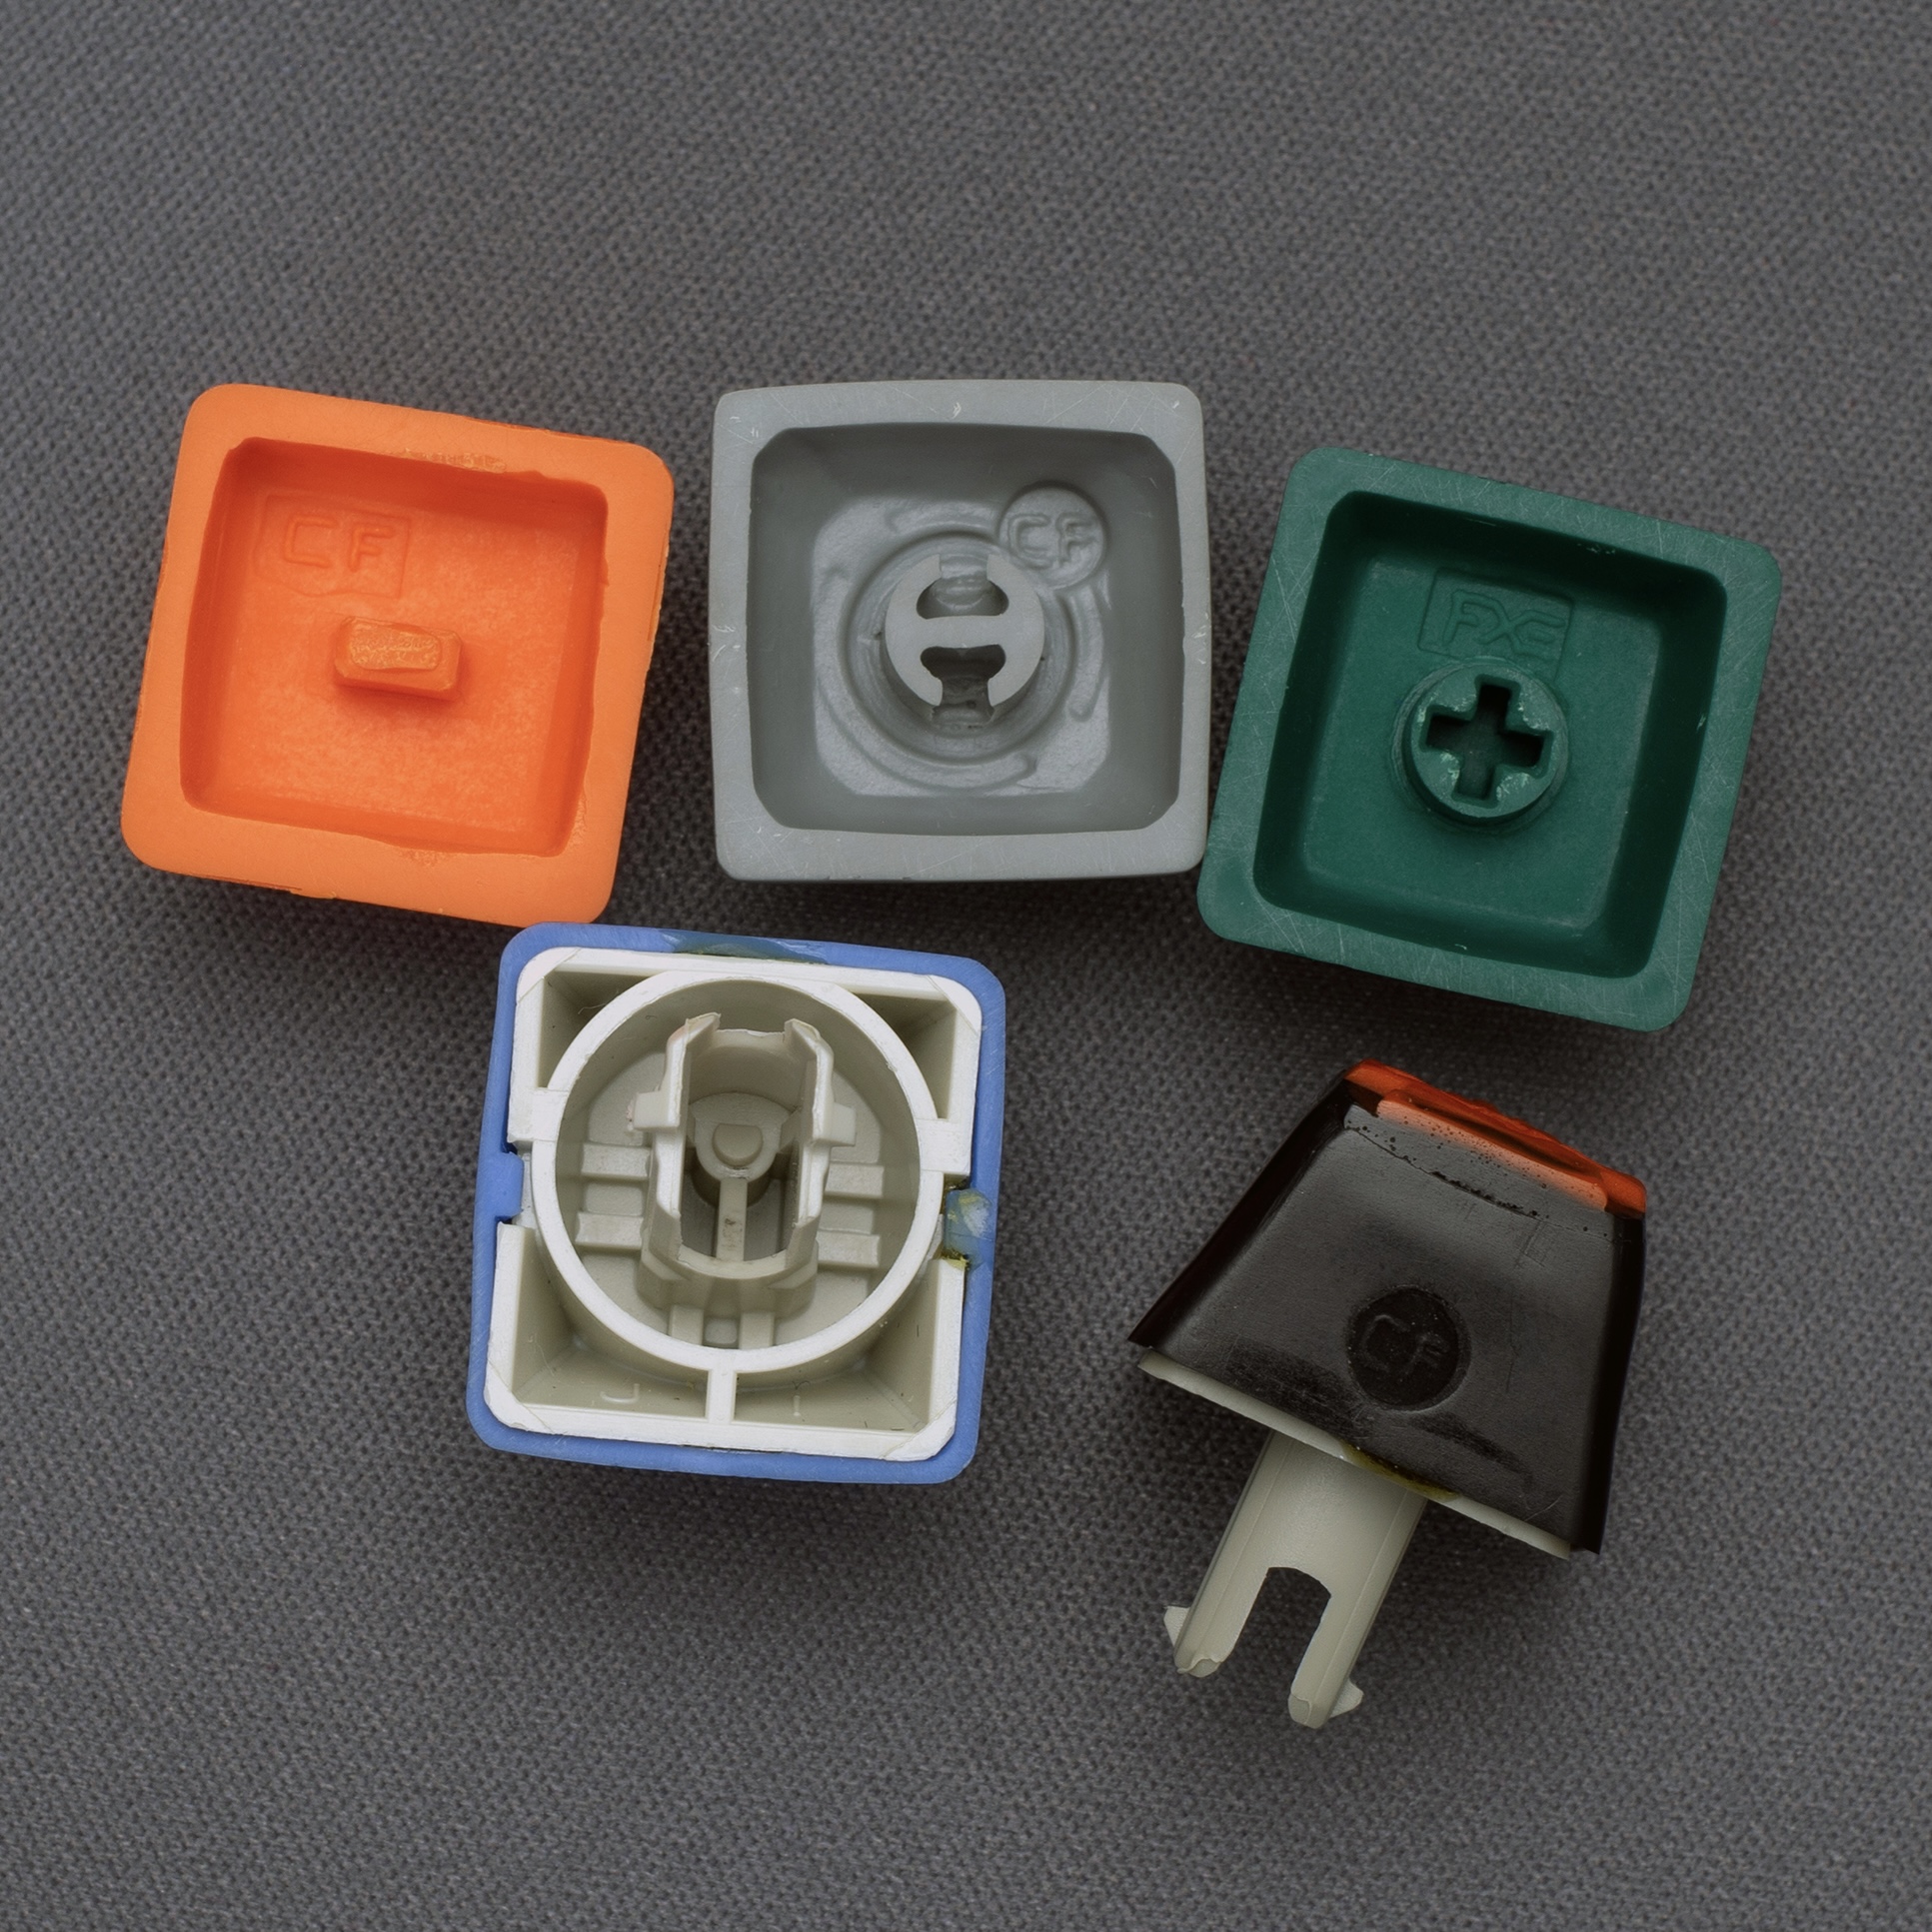
There are no set rules in terms of artisan shape or size, as long as it has a stem that can fit on one of the common mechanical switch types, such as Cherry MX or Topre (T), or less commonly, Alps or Buckling Spring (BS). While MX is by far the most common artisan stem, some makers have adopted "TMX" stem designs, which support both MX and T switches. TMX designs have been through various iterations over the years, some better than others. Brocaps and KWK are examples of makers who have adopted TMX stems in several of their sculpts.
Many hobbyists traditionally use artisans on the top row (row 1) in the Esc key or upper Function key positions. Therefore, artisans are often sculpted on, or to match the profile of, a row 1 cap, most often Cherry or OEM. (See illustration of common keycap profiles, with top row profile highlighted.) That said, you can use artisans on any row you like. Overly tall or wide sculpts that deviate significantly from standard keycap shapes exist, but are not as sought after as those that fit closer to conventional keycap profiles.
Artisan Keycap Profiles and Stems
There are no set rules in terms of artisan shape or size, as long as it has a stem that can fit on one of the common mechanical switch types, such as Cherry MX or Topre (T), or less commonly, Alps or Buckling Spring (BS).
Common Keycap Profiles

Cherry

OEM

DSA

KAM

KAT

MT3

SA
While MX is by far the most common artisan stem, some makers have adopted "TMX" stem designs, which support both MX and T switches. TMX designs have been through various iterations over the years, some better than others. Brocaps and KWK are examples of makers who have adopted TMX stems in several of their sculpts.
Many hobbyists traditionally use artisans on the top row (row 1) in the Esc key or upper Function key positions. Therefore, artisans are often sculpted on, or to match the profile of, a row 1 cap, most often Cherry or OEM. (See illustration of common keycap profiles, with top row profile highlighted.) That said, you can use artisans on any row you like. Overly tall or wide sculpts that deviate significantly from standard keycap shapes exist, but are not as sought after as those that fit closer to conventional keycap profiles.
Artisan “blanks” are handmade caps that conform closely or exactly to the standard profile keycaps, while incorporating various artisanal qualities such a multi-color resin or subtle texture or encapsulated objects within the cap. Gamer sets are common examples of blanks, which are made to replace WASD or arrow keys, along with ESC and function key pairs. Artisan "mods" are hand-made caps that replace modifier keys around the alphas, such as tab, caps lock, shift, alt, ctrl, enter, etc. These keys are larger than 1 unit (1u) in width, and less commonly made than 1u width artisan keycaps.
How Artisans are Made
The topic of how artisan keycaps are created warrants its own dedicated site, but is worth describing at a high-level here to appreciate the process and multiple disciplines involved, and understand why certain keycaps are more sought after.
Artisans can be made using a variety of materials and methods. Making traditional, hand sculpted and casted keycaps consists of pouring liquid resin, mixed with optional colorants and other additives, into a silicone mold made of a master sculpt and base stem, which then hardens into a keycap. This process requires several stages, each of which provide ample opportunity for both creativity and mastery for the artisan maker.
Traditional Artisan Keycap Making Process
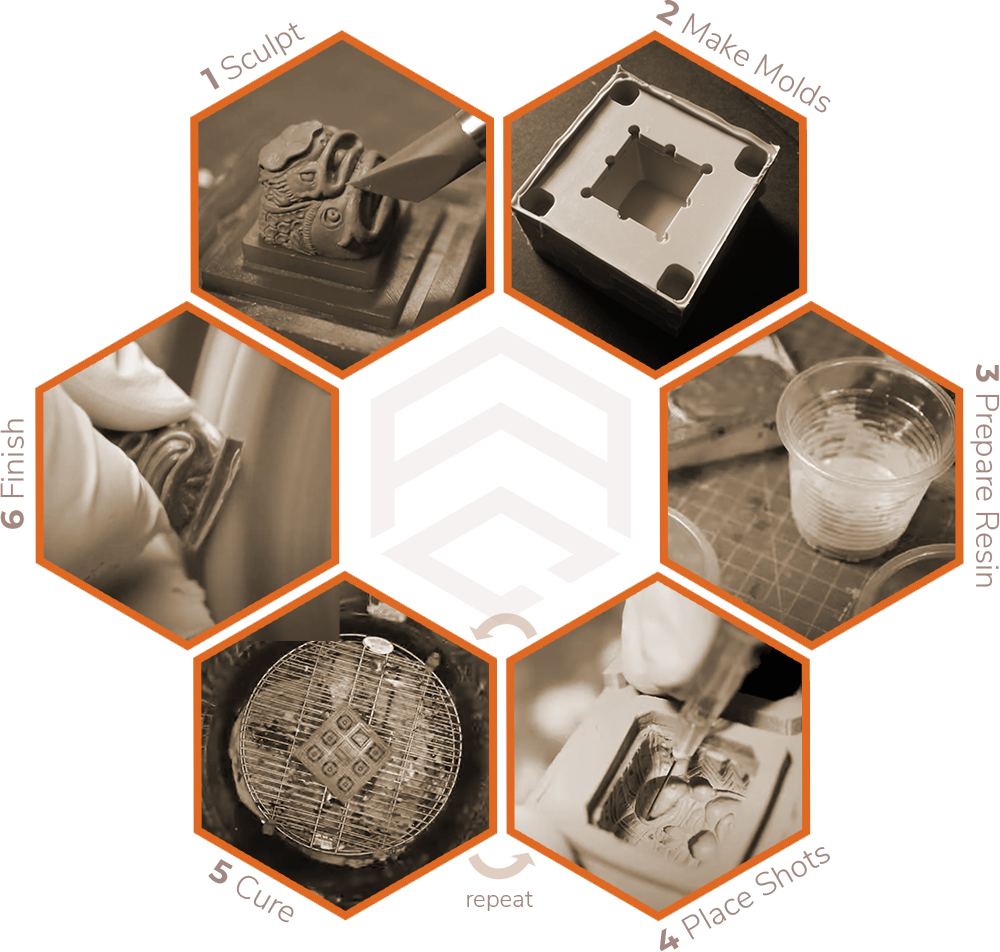


1. Sculpting
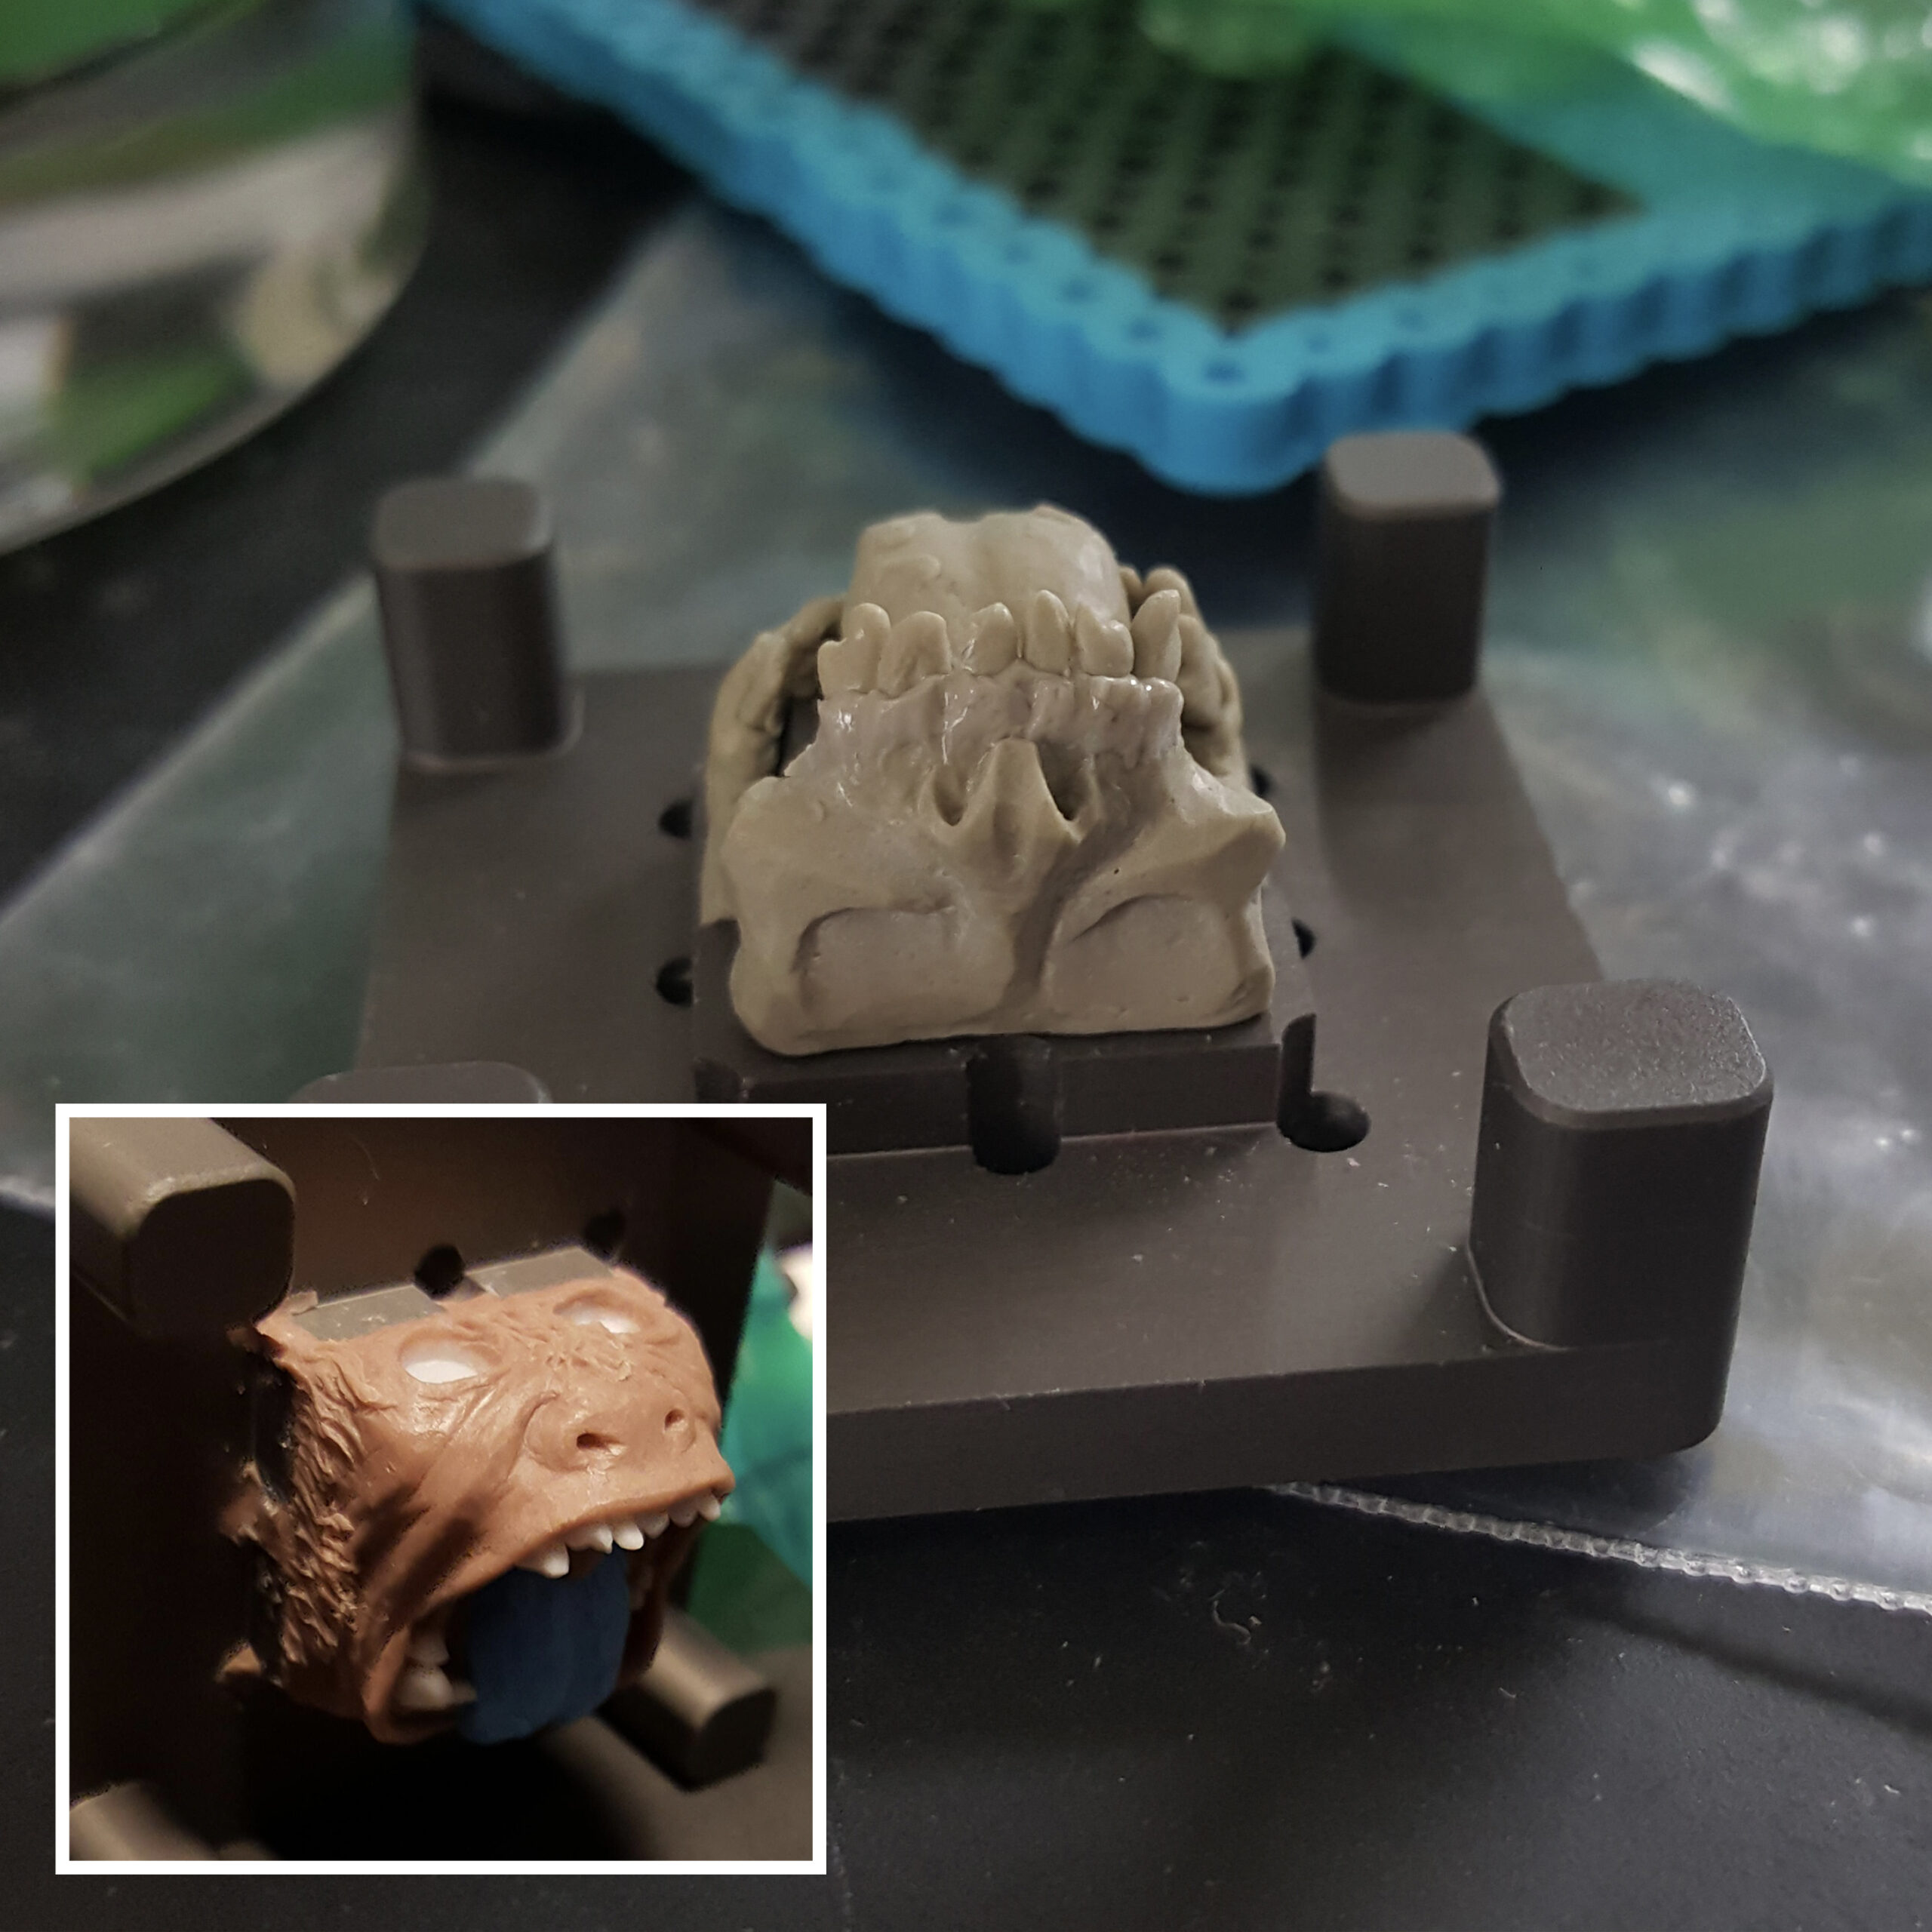
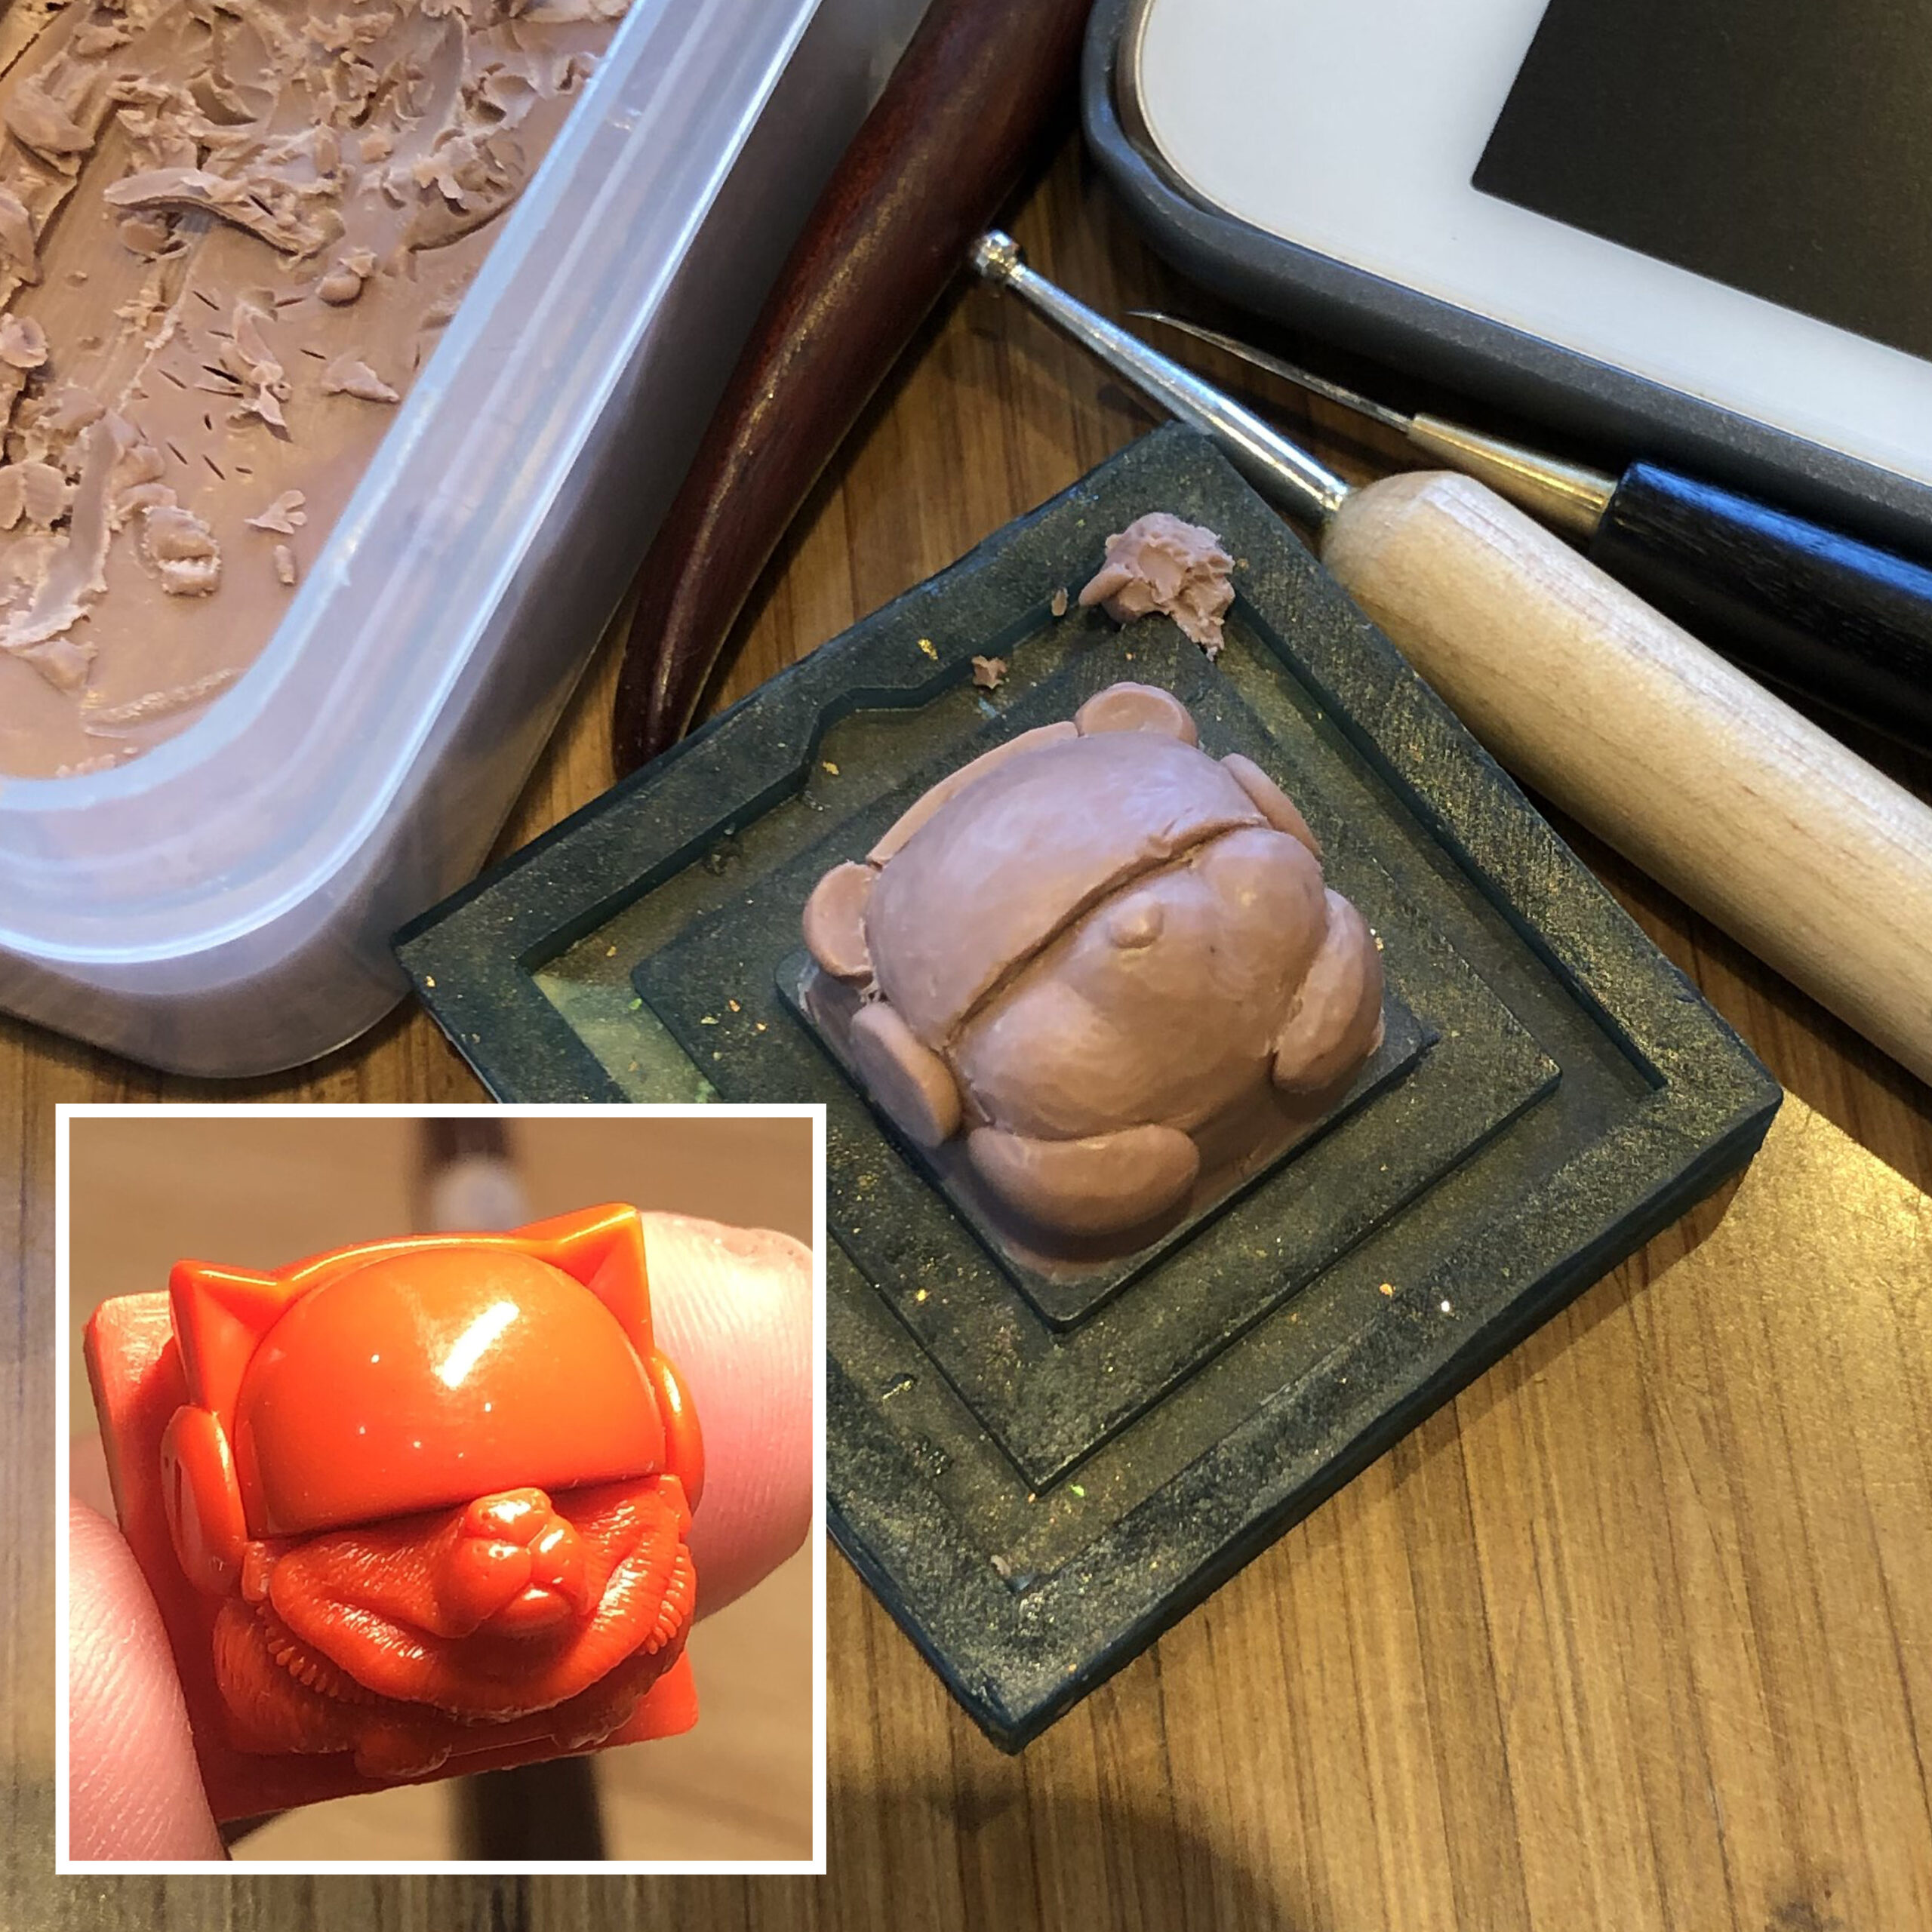
 The first step is to create a three dimensional object that is the subject of the keycap. There are typically two ways to do this from scratch: (1) hand sculpting with some form of clay or wax media, or (2) three dimensional modeling with software, usually followed by 3d printing or machining (which could also be used as a master for hand casted caps). While both require creativity and artistry, hand sculpted masters are generally considered to require more skill across multiple disciplines, and closer to the traditional handmade art form by some collectors. For the purposes of this section we will be focusing primarily on the former, hand-sculpted artisan keycaps.
Creating detailed sculpts at the scale of a keycap require fine tools often used by sculptors in other sculpture art domains. In some cases, makers have been known to design their own tools to implement specific techniques or fit their preferred workflow. Sculpting material usually consists of various clay or wax media. Monster clay, CX5, and Sculpy are common brands of choice. Artists will have their preferred workflow and choose material based on personal preferences.
Some artists sculpt from a piece of clay in the general size of a keycap, others may use an existing keycap and add clay shapes to it, while others may sculpt their keycaps on 3rd party platforms that are designed to assist with making artisans, such as the :~$ynth or ZButt. Sometimes, pre-made objects are added to a clay sculpt to form parts of the object, such as small ball bearings for eyeballs. Sculpting is usually an iterative process that refines the artisan's vision over multiple versions. One area that makers sometimes overlook is ensuring that there is enough clearance around the sculpt to accommodate other keycaps or high profile cases. The symptom of this issue is when you cannot fit multiple of the sculpt next to one another, or a single one rubs on other surrounding caps when pressed.
Certain elements of the sculpt will impact the ease or difficulty of the subsequent casting and mold making steps. For example, larger smooth surfaces make it easier to employ resin writing techniques, careful placement of ridges may help with color separation, while deep indentations may damage or weaken parts of the mold when removing the resin cast. These are elements that the maker must consider, and envision the inverse of the surface in a mold, as they sculpt. With experience, artisan keycap makers become more adept at understanding how the geometry of a sculpt will impact subsequent aspects of the process.
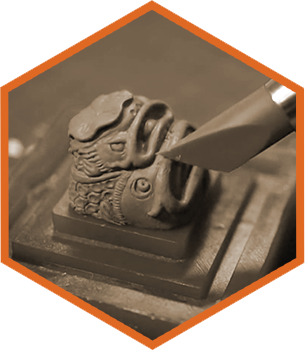
2. Mold Making
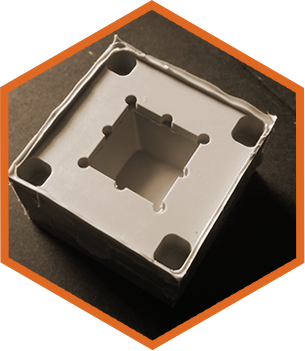
 After the sculpt is ready, one or more molds will be made from the original art. This is typically done using mold-making silicone to create a two part mold: one for the top half with the sculpt, and another for the bottom half with the base and stem. A structure is created that surrounds the sculpt and base, and the silicone is poured carefully into a corner of the structure until it fills to the top without any bubbles. Lego bricks can be used to create the structure for the mold, or if you are using a solution like the :~$ynth, it comes with it's own box to pour the silicone into.
The bottom part of the mold is created in a similar fashion, but using sprues that attach to certain parts of the cap base, to enable air and excess resin to escape through. Sprues are usually placed on the corners of the cap base, and can also be added to the stem. Mold release is applied to the sculpt and base so that the silicone can be removed more easily once it is cured.
Makers creating multiple caps for larger sales usually make multiple molds for higher-volume casting sessions. As molds are successively used to create casts, they tend to become worn over time, losing fine details and eventually forming cracks. At some point, the molds will need to be retired and new ones will need to be made to continue casting the sculpt. Some makers retire the sculpt once the initial molds wear out.
3. Resin Preparation
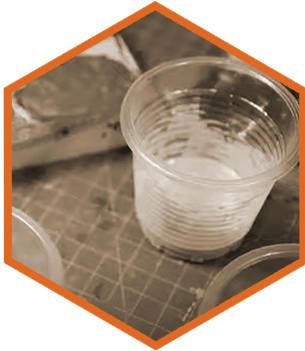
 The core ingredient of an artisan keycap is a 2-part liquid synthetic resin, which is mixed with colorants or additives, and then poured into the mold. By default, the resin is colorless and transparent, unless dye or pigment is mixed into it. Virtually unlimited options exist for colored dyes, pigments, metallic powders, UV activated powders, and other additives, giving makers a wide choice of creative options to realize their vision. The sourcing and mixing of these additives lends further individuality and uniqueness to the cap.
Different types of resin have different curing timeframes. Depending on how many color applications and the type of surface texture, the maker may choose to use slower or faster curing resin. Matching keyset colors can add a further challenge to the mix, where a maker must try test applications to see how the color looks when cured. All these variables add enormous permutations and combinations at this phase of the artisan making process.
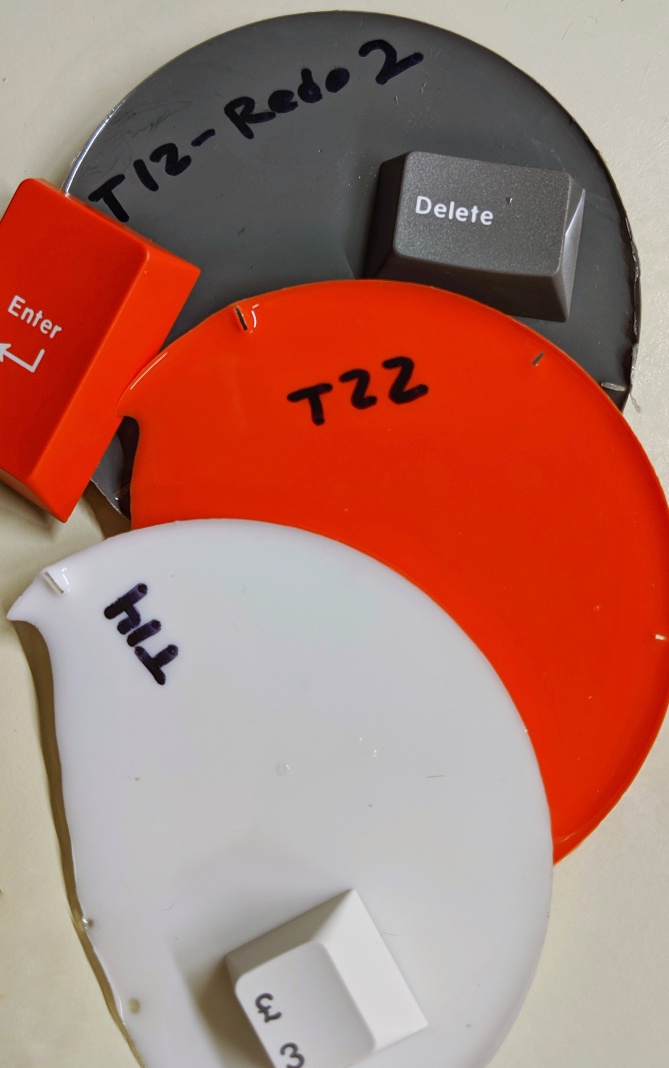
HWS Color Match Testing Before Casting (Binge)
4. Resin Placement
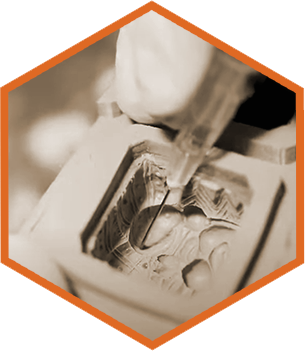
 Imagine having to place tiny drops of liquid into several sockets less than a millimeter in diameter, multiple times, across a sculpted surface no bigger than your fingernail, within a specific time limit. If you mess up just one drop, or run out of time, you have to start all over again. Now repeat the process multiple times for every cap you want to make, ensuring there are no discernible differences between each one. Keycap casting difficulty can range from simple single-color casts to complex, multi-shot casting with resin writing and other techniques that can take hours of painstaking, meticulous work.
In this step of the process, the maker has to place the resin they mixed, which has a certain time limit before it cures, into the appropriate place into the mold. It is challenging to visualize the final output, because the surface of the mold is an inverse of the sculpt, and the resin color appears different in liquid form versus when it is cured.
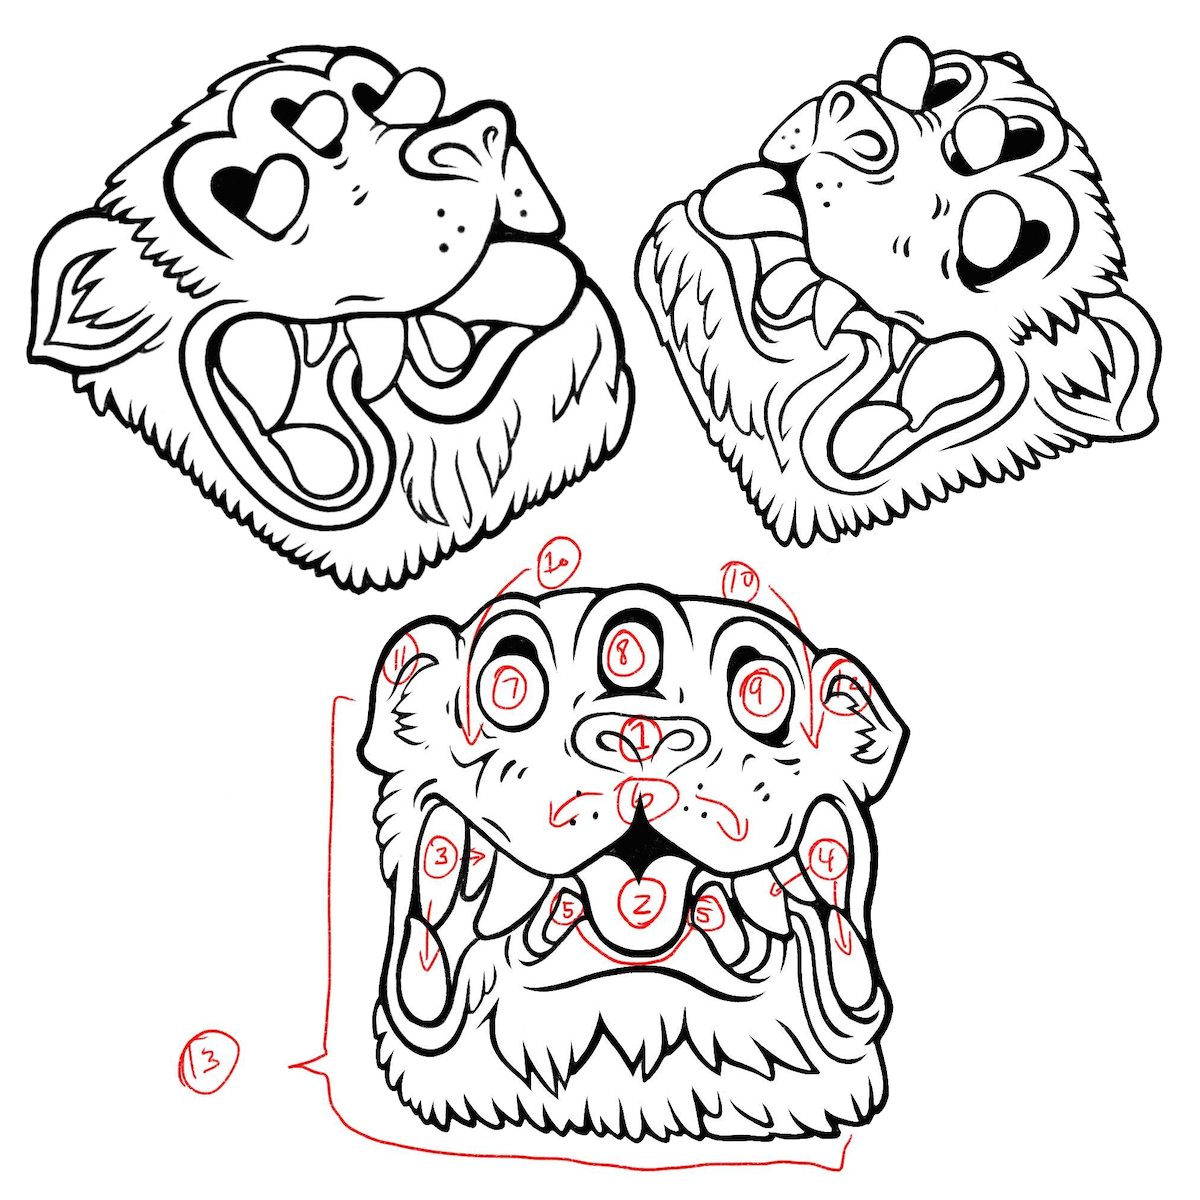
Each placement of individual color is called a "shot". If the design calls for multiple areas to be colored differently, each color may require a separate shot, with a different resin mixture. You also have multiple shots with the same color in certain cases, such as layering. If a sculpt has elements on the sides of the mold that need to be colored separately, the mold will have to be tilted to allow the resin to fill that area properly. This means that other areas of the mold may need to be cured first, elongating the process time and complexity.
The illustration above from GAF showcases an example of shot placement planning for a Typebeast. Note that this is a slightly taller sculpt which results in separate elements across the sides of the mold and deeply inset eyes and nose. As a result, shots placed on either side of the sculpt need to be cast and cured first, with the mold placed on each side during curing cycles. For example, casting teeth in a separate color requires three shots: one on each side of the mold and a third at the bottom of the mouth at the lower part of the mold. Separate colors for the tongue, nose, each eye socket, ear tips, snout, upper fur, and lower fur result in a total of 13 shots with multiple cure cycles.
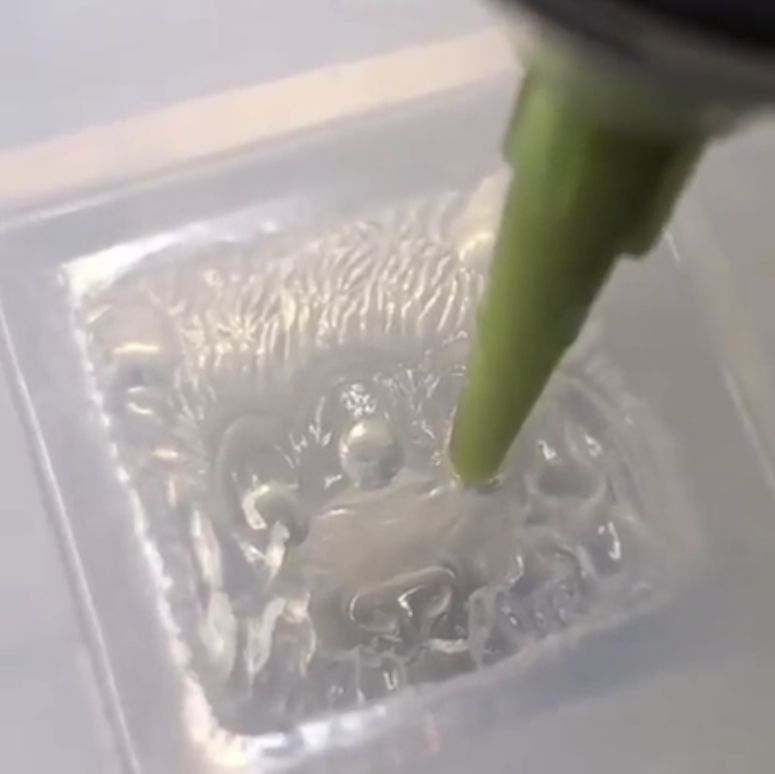
The close-up photo of the Typebeast mold shows a syringe applicator being used to place the resin shots into each eye socket. Depending on the colorway complexity and sculpt geometry, the production time for a batch of caps like this can take as much as 8 or more hours to fully produce. Furthermore, depending how particular the maker is about bleed or other imperfections, the "yield" of a-stock caps may be lower, resulting in lost time and corresponding revenue. Therefore, some makers price their caps based on the shot complexity and yield, with simple single shot colorways of the same sculpt priced lower than sophisticated multi-shot colorways.
Common techniques used during resin placement include:
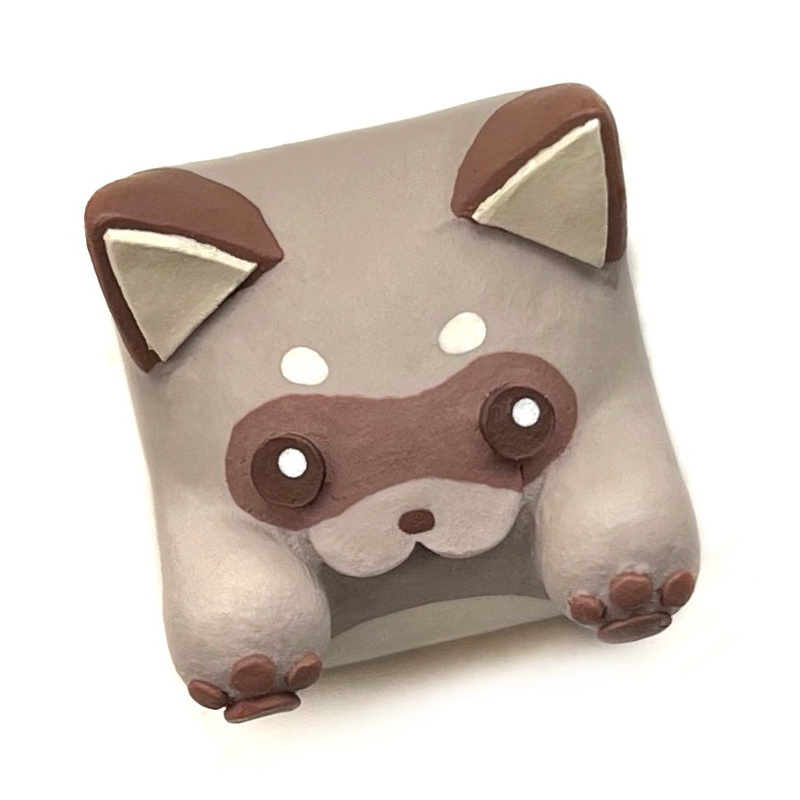
Masking is where a resin color is specifically limited to a certain area of the sculpt, and adjacent colors are clearly delineated. This is a common technique on many artisans, but not easily executed, as evidenced when you see areas of color "bleed" from one section of the sculpt to another. Bongos, like this Tanuki by Hello Caps, are great examples of masking technique, and show how a sculpt with simple, symmetric form can provide ample opportunities for colorway variation and creativity.
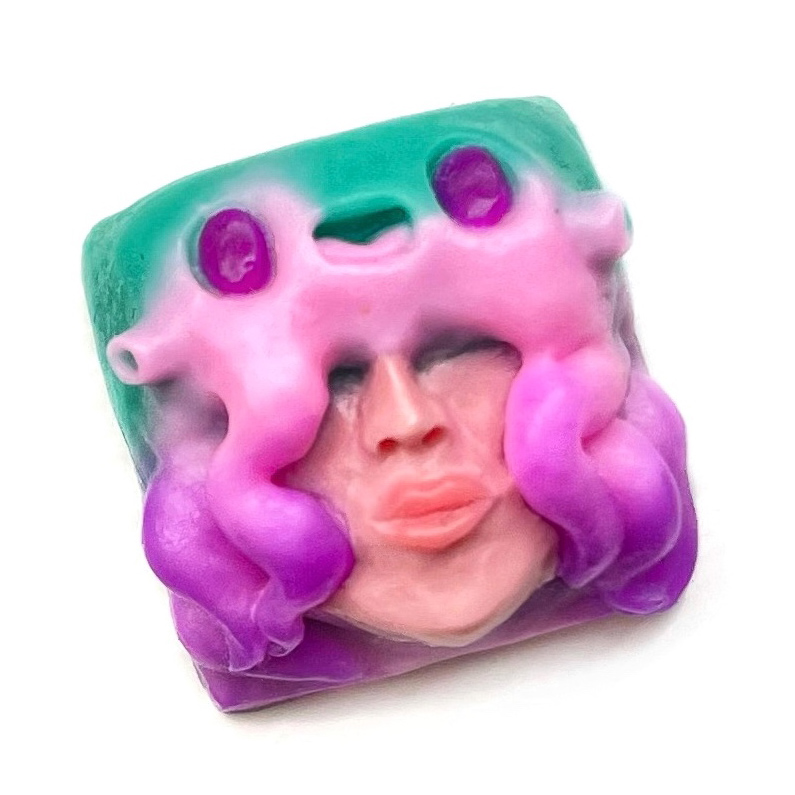
Blending is where two or more resin colors are blended together where they meet in the mold, to create a gradient or ombre effect. The tentacles of the sea creature perched on the head of this Ikkakujuu Ama from Wildstory showcase some vibrant resin blending work.

Marbling is where two or more resin colors are mixed without blending, then poured into the mold to create a swirling or marbled pattern. This Vitamin Fugthulhu from Nightcaps (a collaboration sculpt with Hunger Work Studio) showcases a sophisticated marbling effect with at least six distinct resin colors.
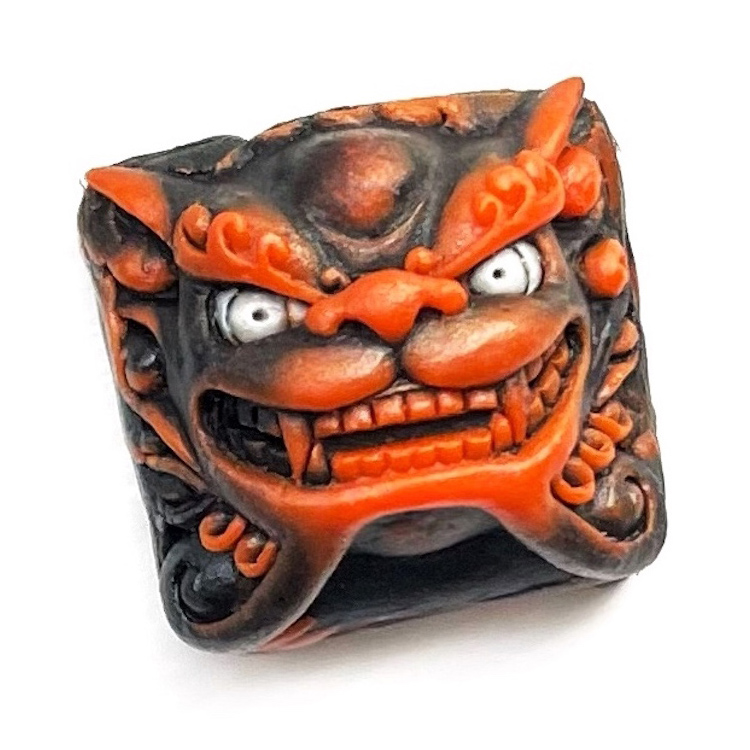
Slush casting is the process of pouring a small amount of resin into the mold and rotating it around until a the color pools into the deeper parts of the sculpt, resulting in a “shading” or layered effect when combined with subsequent shots. Can sometimes look like blending, but with a vertical gradation between the colors. Keyforge uses slush casting heavily in his colorways, such as this Vocanic Shishi.
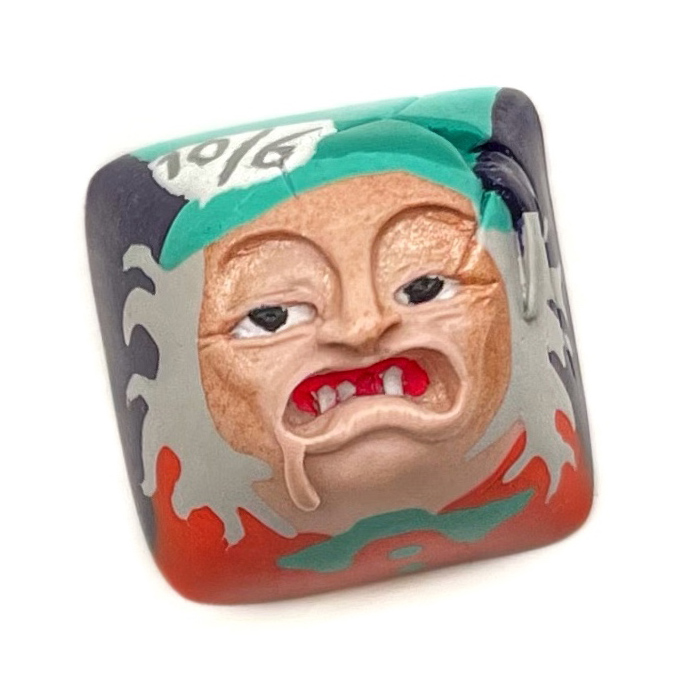
Resin writing, or resin painting, is when the artist uses a fine point applicator to "write" or "paint" shapes on the surface of the mold with different colors. This requires the resin to partially cure to a certain level of tackiness, and/or using a filler to make the resin more viscous, so it doesn't drip or blend into other colors. Some Nightcaps colorways demonstrate fantastic resin writing proficiency, such as this Through the Looking Glass Mad Hatter Smegface (a collaboration sculpt with GAF). Note the character's iconic "10/6" card, written in resin on the top part of the sculpt.
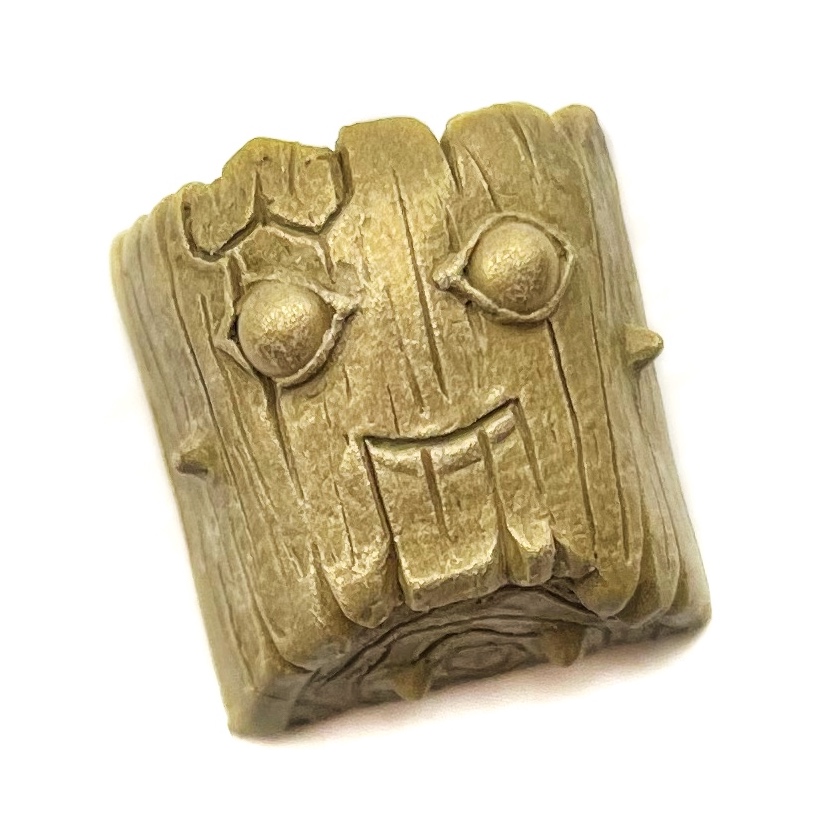
Cold casting is when the maker mixes metal powder into the resin to create a cast that gives the appearance of solid metal. These powders can simulate various metals such as bronze, steel, silver, gold, and copper, and can be polished in areas to give a smoother appearance. Artisans made using this process are often heavier than their non-cold cast counterparts. This Zorbcaps Entling v2 was made using a bronze cold cast process.

Some artisans incorporate "encapsulation" of other cast elements or pre-made objects into the sculpt. A well-known early example of this type of design is by Keykollectiv, who collaborated with Omniclectic to create the "Kosmo". This design includes cast skull encapsulated inside of an astronaut suit sculpt, based on Omniclectic's Cosmo. This example is the X15 Kosmo v2 from the Kosmonavt Reissue sale, which was released in both MX and Topre stem variants.
These, and other resin placement methods and techniques that makers have developed, can be combined in different ways to achieve incredibly varied results across the same sculpt. Makers are continually pushing the creative and technical envelope to release amazing new sculpts and colorways each year. Given the increasing number of sculpts and colorways, many hobbyists now focus their efforts on collecting and curating colorway variations of a few sculpts that they really like, or match a certain subject theme.
5. Curing
 Once the resin shots have been placed in the mold, the two parts of the mold are sealed together and the resin inside needs to be left to cure. The most vital aspect during the curing process is to ensure that all the air is removed from the mold. Excess air causes bubbles to get trapped, resulting in defects on the surface of the cap or internal weakness, which can be especially problematic on the stem.
The simplest method of curing is to avoid any equipment and rely on gravity to settle the resin into the mold parts, known as "gravity casting". However, most makers who produce high-quality keycaps place their resin in a vacuum chamber or resin-filled mold into pressure pot (not the cooking type) connected to an air pump, which pressurizes the chamber during curing to minimize and reduce the size of air bubbles in the resin. Some makers add external heat sources to the chamber during curing to speed up the process.
Sometimes, the mold may have individual shots that need to be partially cured before subsequent resin is added to the mold, in which case the previous step is repeated until the final resin is poured into the two part mold and cured.
6. Finishing
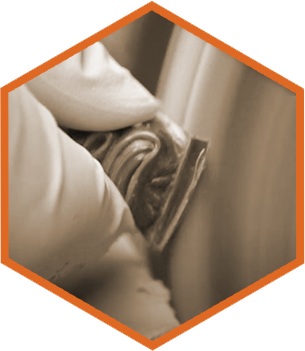
 After the keycap is cured and removed from the mold, the excess resin and sprues need to be clipped and the base is sanded. The cap is examined for any bubbles or flaws that would result in it not meeting the maker's standards to be considered "a-stock" for a sale. Some makers may sell slightly imperfect, or "b-stock" keycaps for lower amounts, give them away, or re-purpose them into magnets or keychains.
Additional finishing touches may include adding anti-counterfeit markings or elements, such as serial numbers or other markings in an inconspicuous place, such as the underside of the cap. The completed artisan keycaps are then photographed and ready for sale and to be sent to their lucky new owners.
Artisan Categories
As you can see from the steps involved, hand-sculpted, resin-cast artisans involve a non-trivial amount of effort across multiple disciplines and media. While the barrier to entry is low, the time required to master these elements and techniques can be considerable. Each artisan keycap made this way is unique, whether the maker produces 10 or 100 of them. It is fascinating to see how the art has evolved over time, and to watch makers progressively improve their techniques and capabilities.
This guide is by no means a comprehensive review of the process, nor does it cover other types of materials or creative options such as 3d printing, injection molding, painting, metal, and wood. However, understanding the fundamentals hopefully imparts an appreciation for the amount of creativity, artistry, and effort that is packed into roughly 1.5 cubic centimeters, surely making artisan keycaps one of the highest density art forms. These are also the characteristics make traditional hand-sculpted, hand-cast keycaps typically more sought after relative to ones that use other media or methods of creation.In the illustration below, we briefly describe other categories of artisans beyond the aforementioned hand-sculpted and resin cast keycaps, so you can understand the various types available and how to distinguish them...
Common Artisan Categories and Examples
(Under review, may be updated)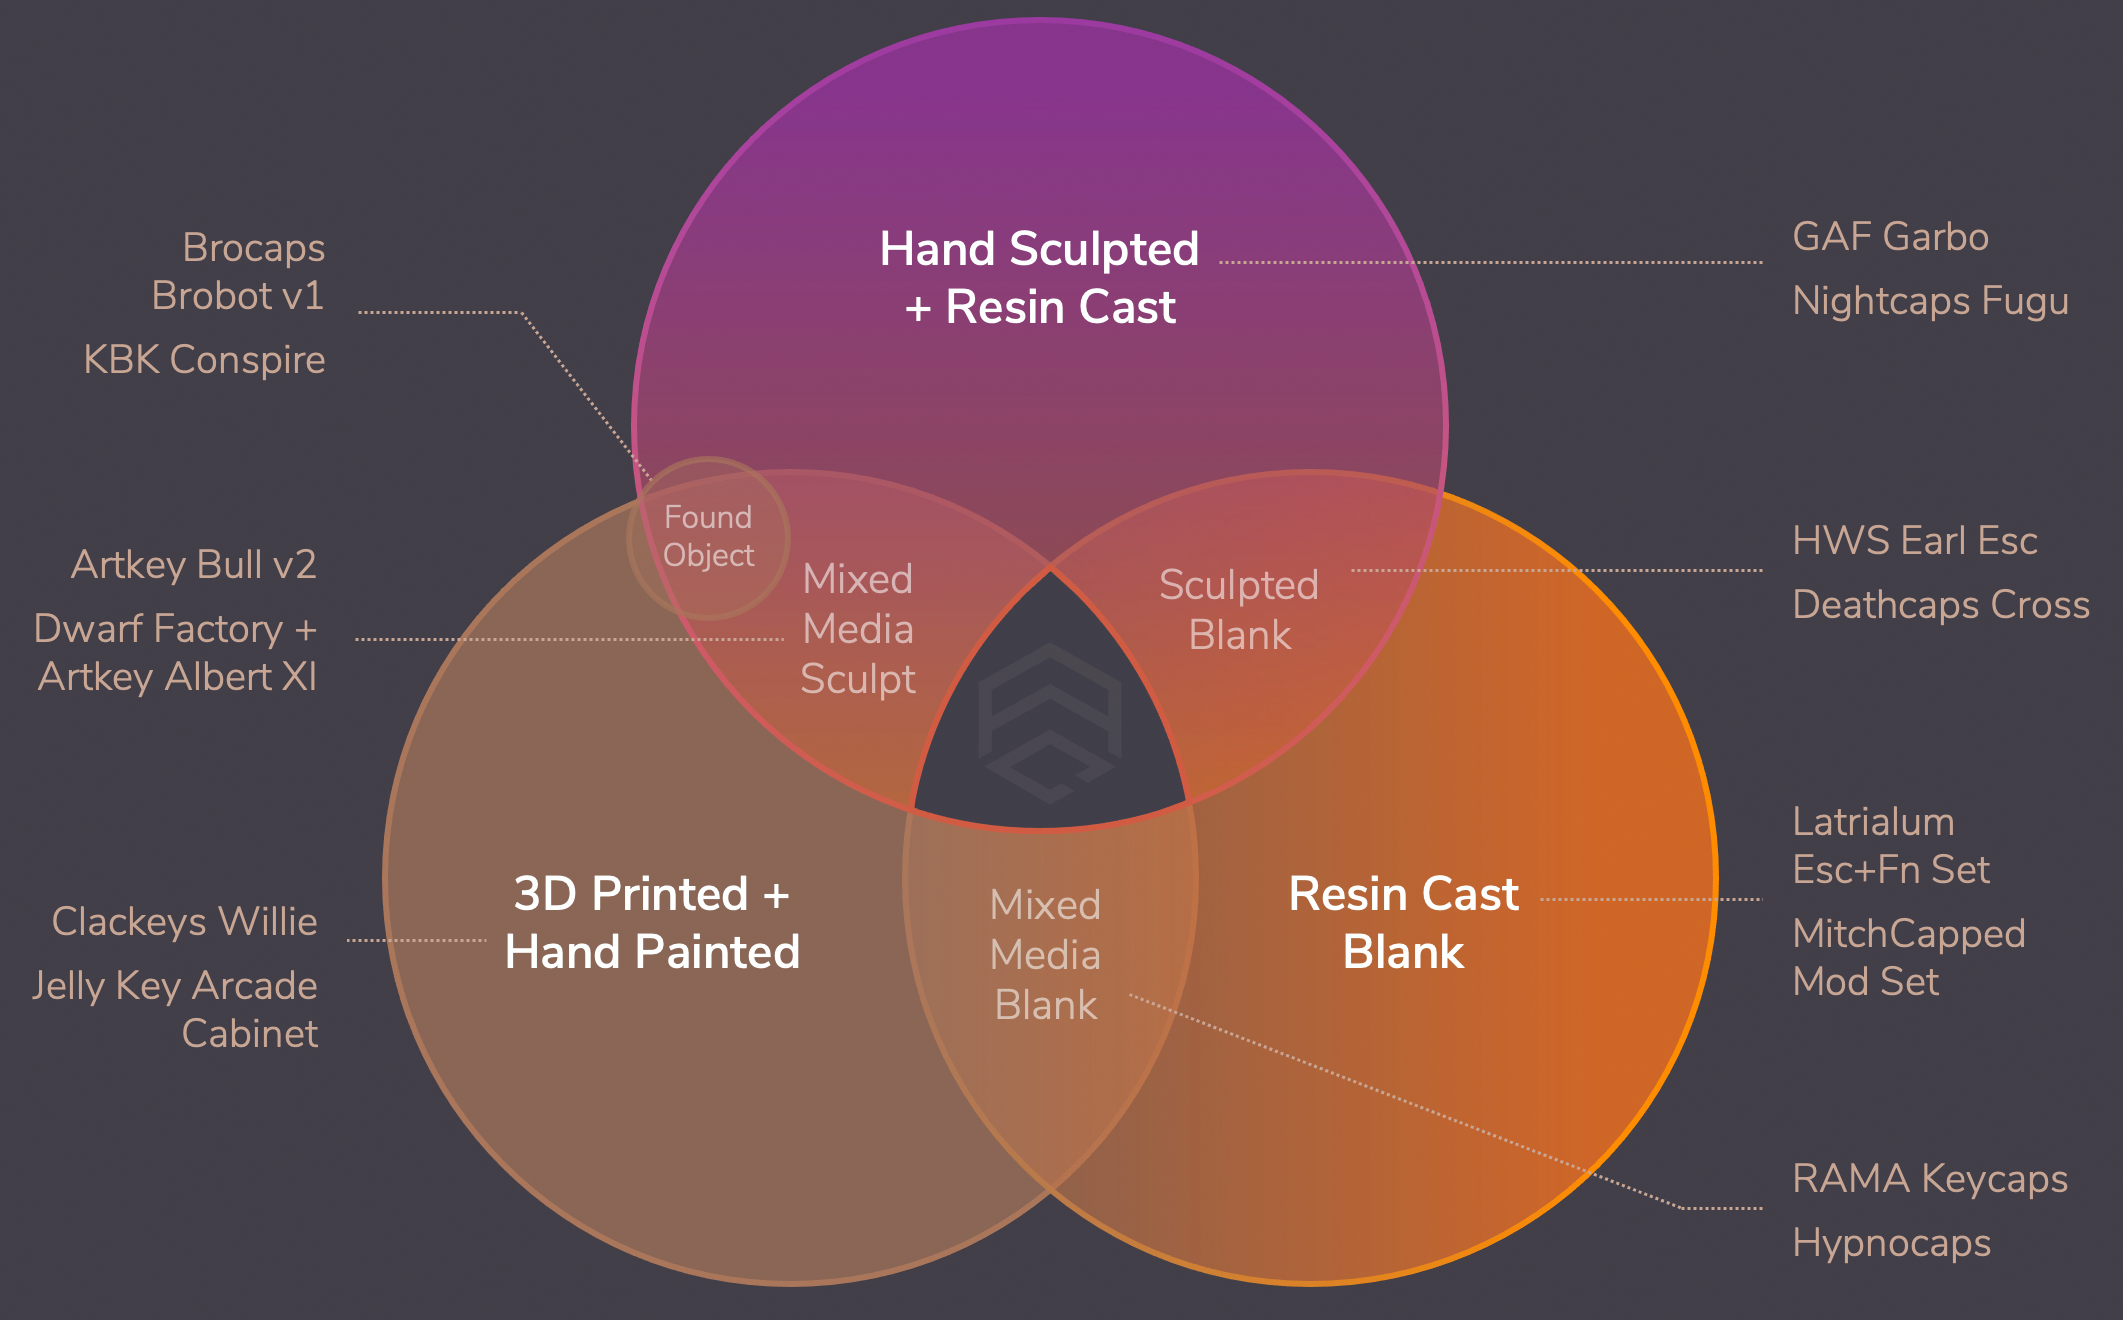
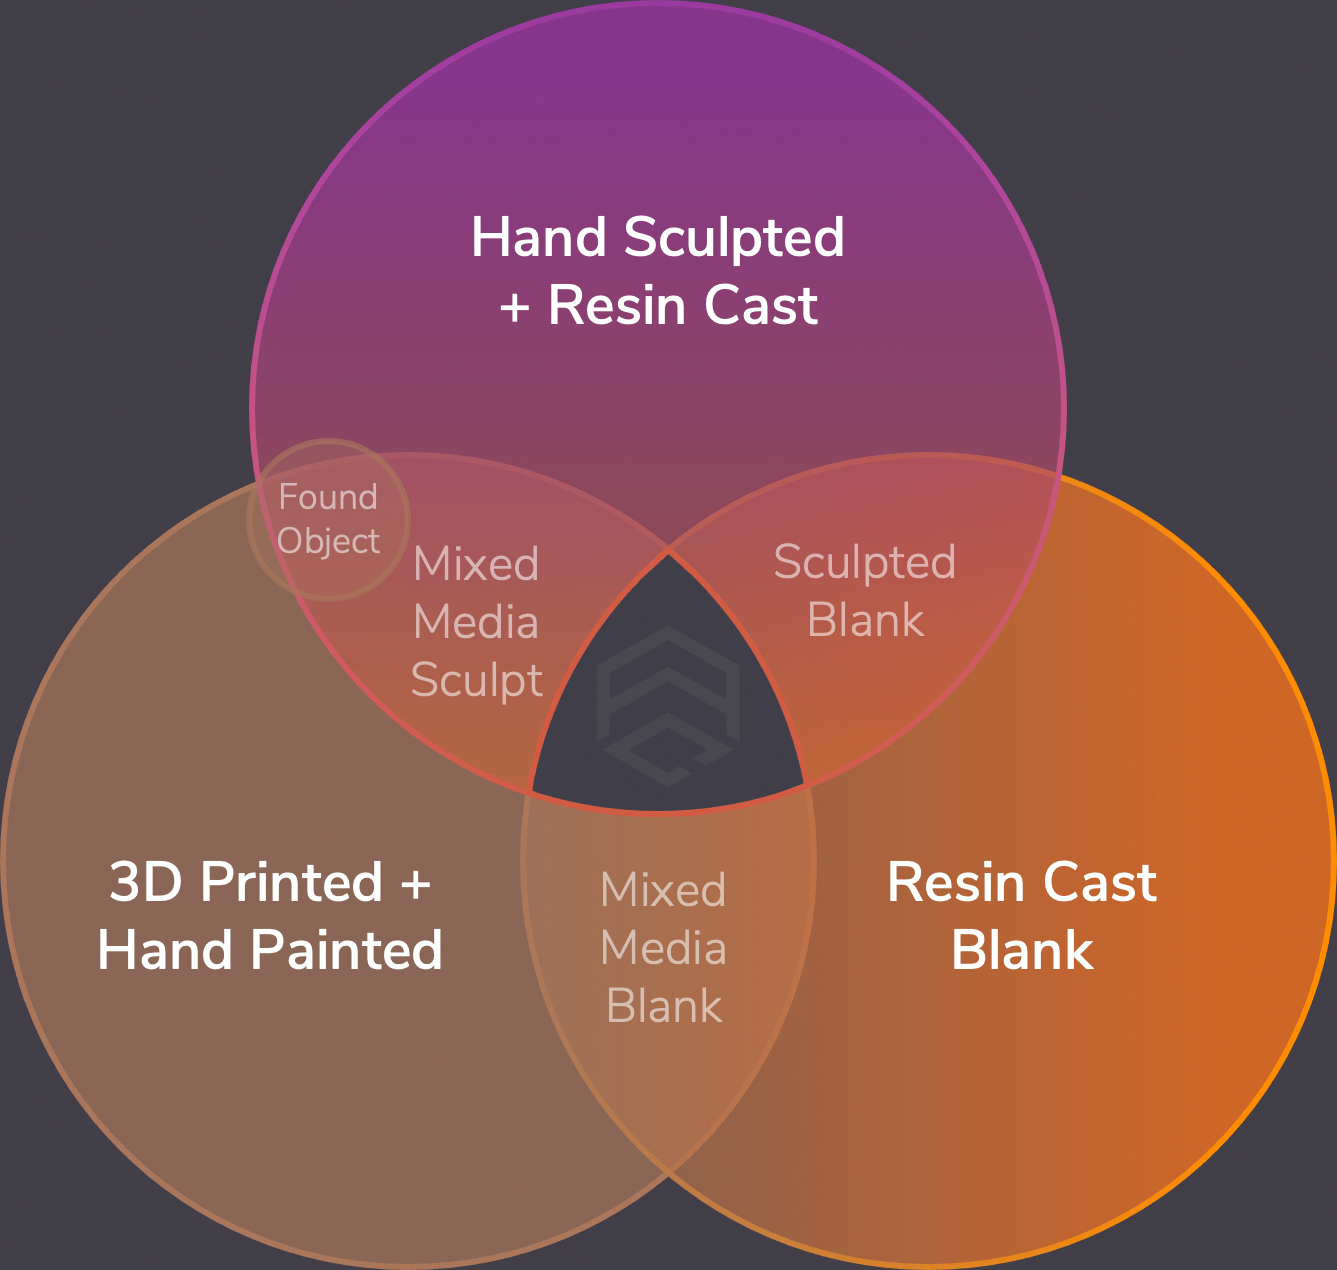
Hand Sculpted, Resin Cast Artisans
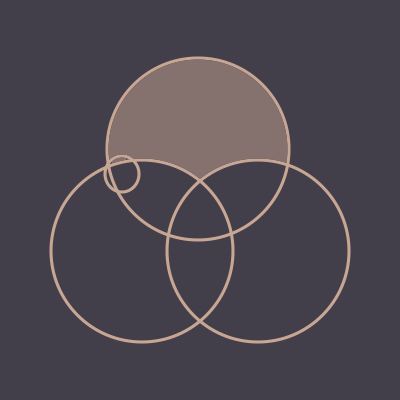 This category covers all traditionally-made artisans following the process described in this guide above. While great artisan keycaps can be made using other methods, hand sculpted, hand cast resin caps represent some of the most impressive feats of manual artisanal labor across multiple disciplines, and garner critical acclaim from aficionados.
 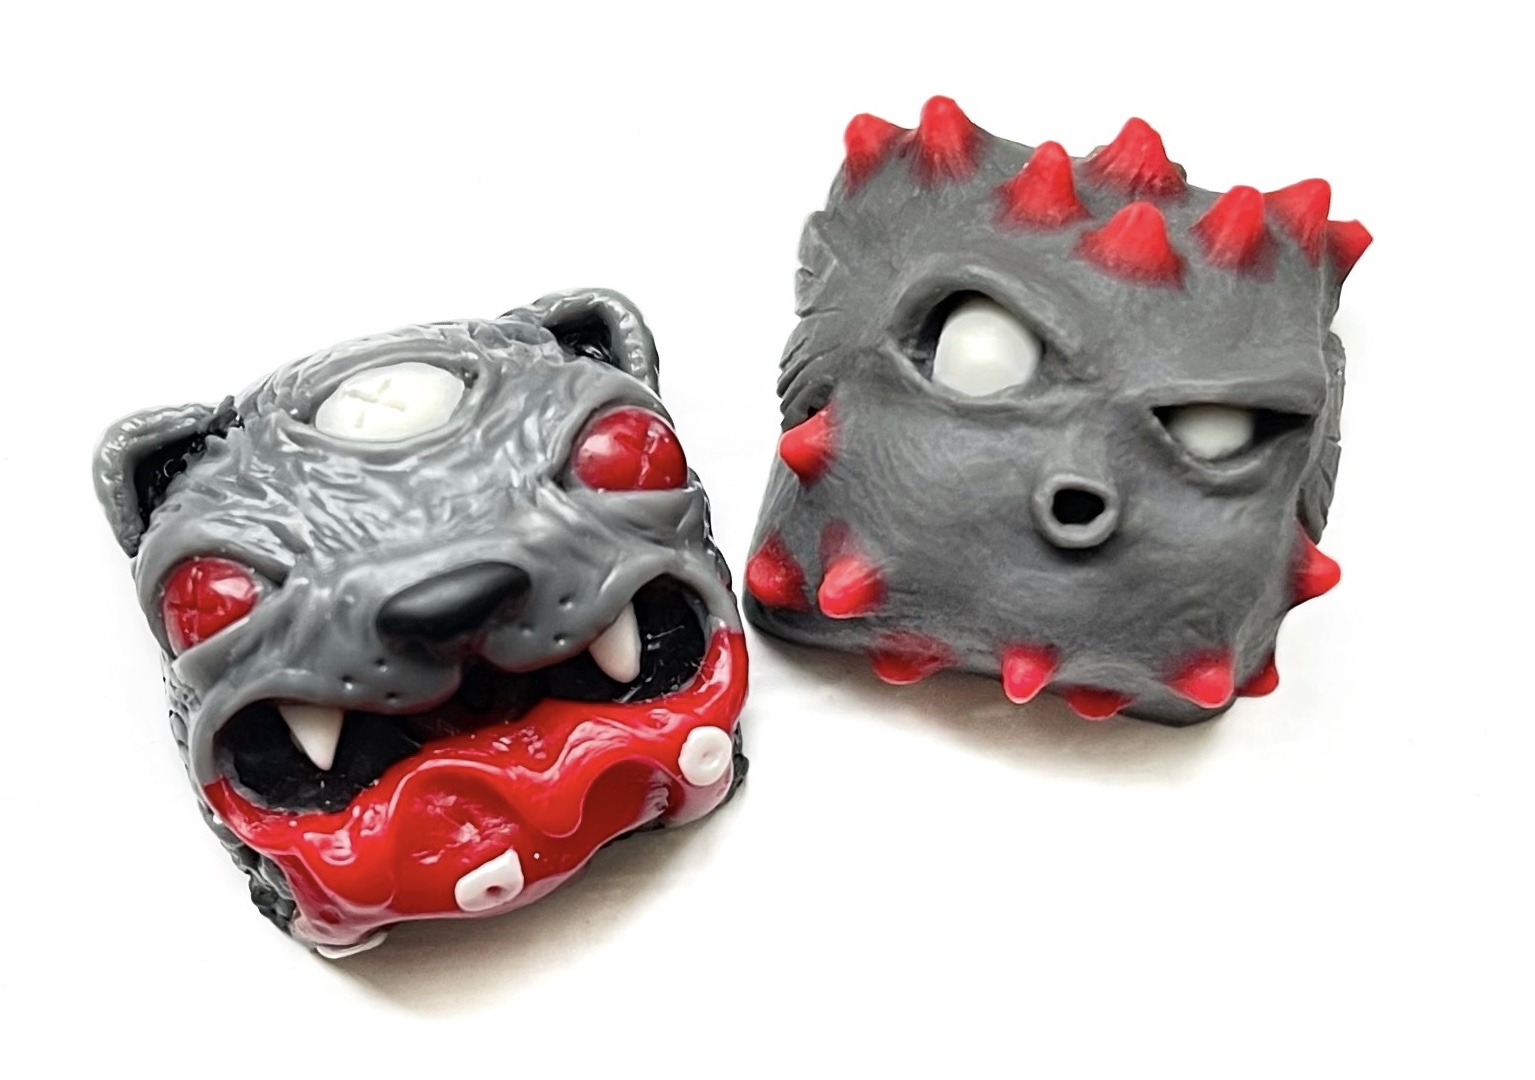 Numerous popular makers and artisans fall within this category, and are likely to comprise the majority of many hobbyists' collections. There are almost too many examples of artisans in this category to mention, but recognizable ones include the prized Garbo v1 or v2 from GAF, and iconic Fugu from Nightcaps (and any other caps from those well-known makers).
3D Sculpted, Painted Artisans
 At another end of the spectrum are digital 3D sculpted and painted artisans. These are sculpted in 3D software, 3D printed, and then either painted directly, or cast as a single shot cap from a mold of the 3D master and then hand painted. There are some fantastic artisans made using this method, and it certainly takes skill to master 3D sculpting software and hand painting. However, because of the physical limitations that would otherwise be present with hand sculpting and resin shot casting, artisans in this category are normally not as broadly sought after or as highly valued in the secondary market.
 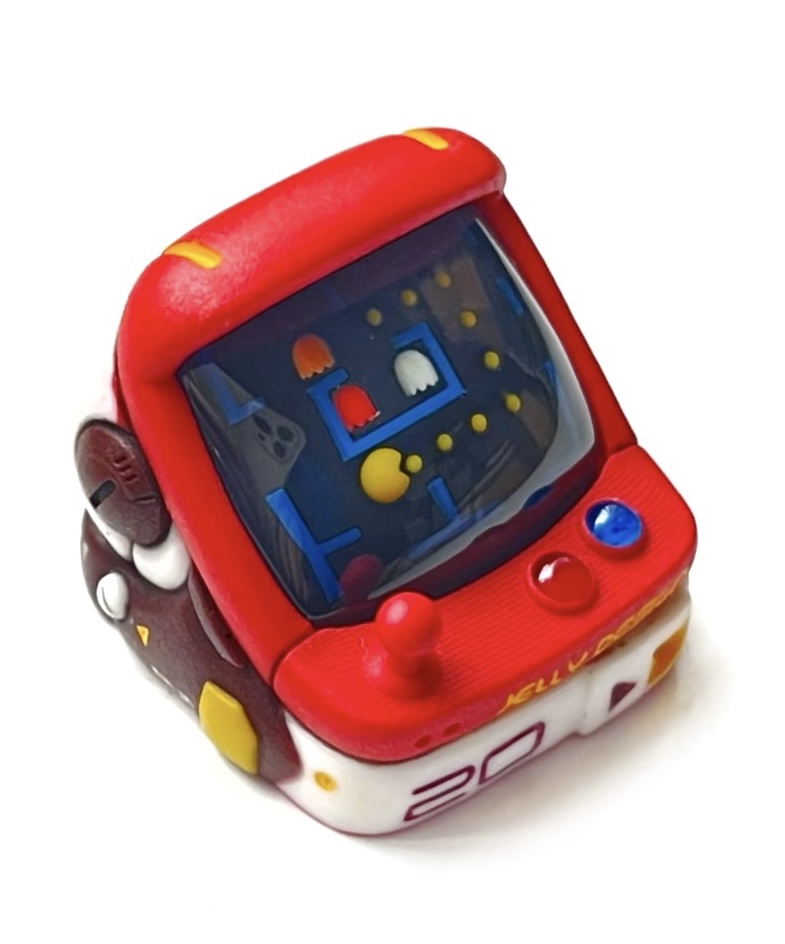 The availability and price point of some of the keycaps in this category often make them natural options for beginners or casual hobbyists. Some examples of these artisans are the pirate-themed Big Willie sculpt from Clackeys, and the impressively-detailed, retro-looking Jelly Key Arcade Cabinet series.
Mixed Media Sculpts (including "Found Objects")
 At the intersection of the aforementioned two categories are artisans that are made from some combination of 3D or hand sculpting, with resin cast or painted colors. For example, Artkey has a very popular artisan sculpt called Bull v2, that combines 3D sculpting, hand sculpting (layered on top of the 3D print), and multi-shot resin casting.
 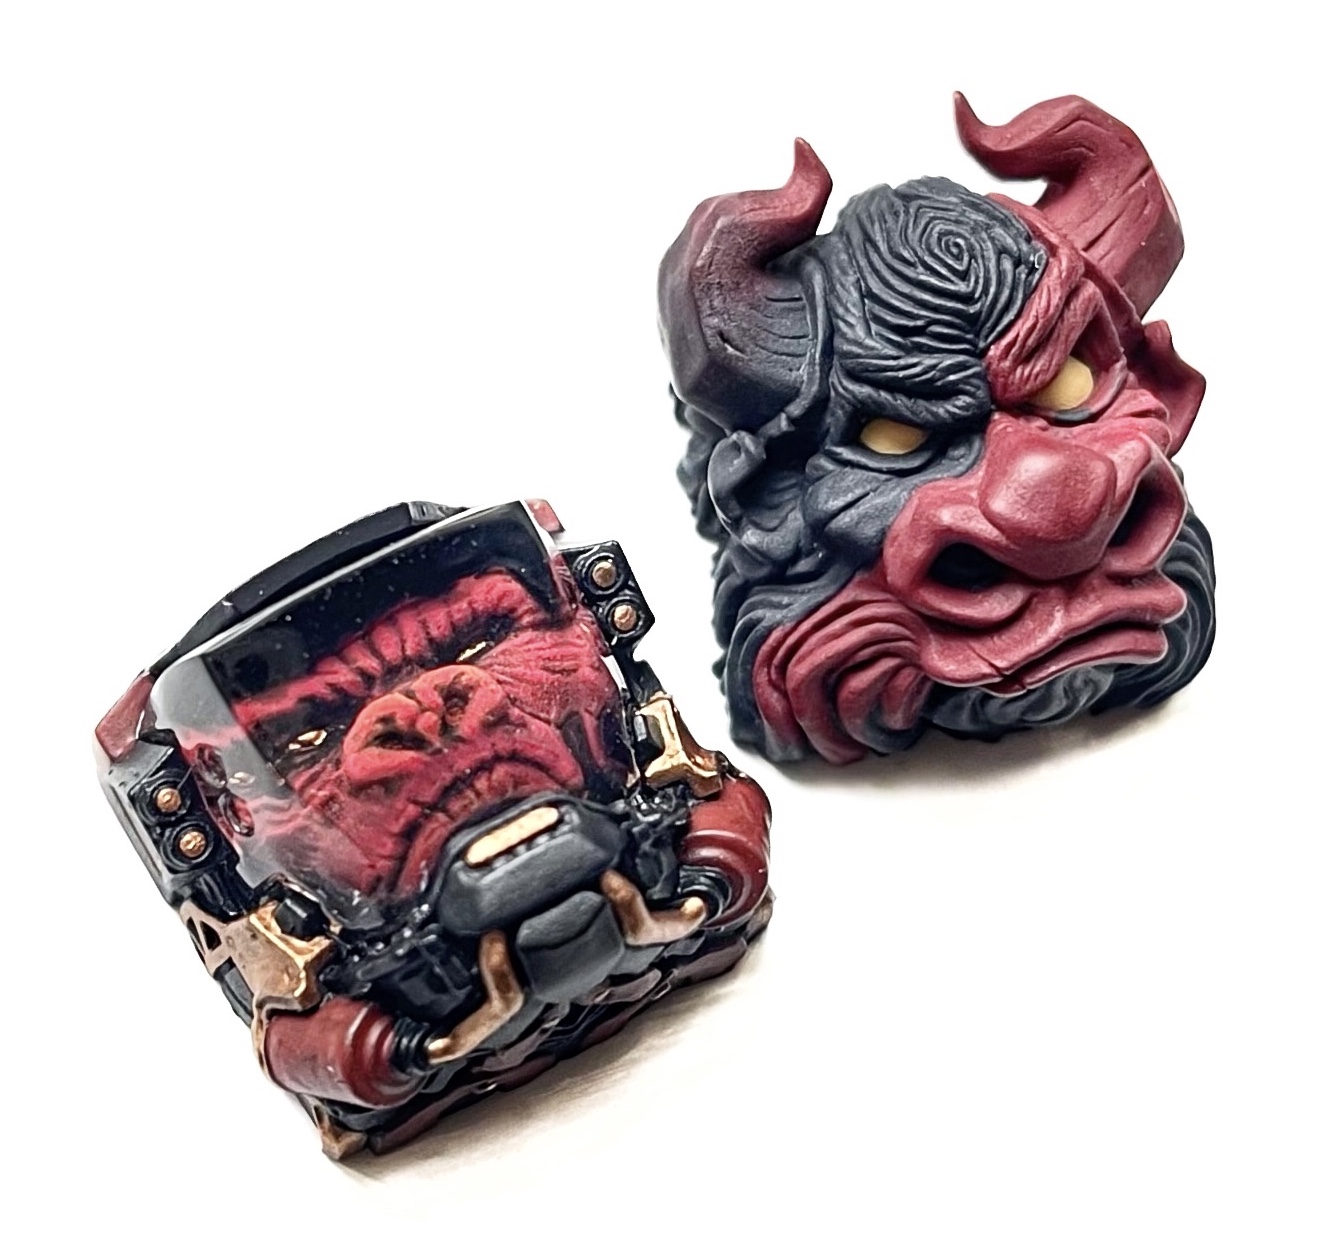 Dwarf Factory, another popular Vietnamese maker that is broadly followed by many casual hobbyists, makes finely detailed resin cast and hand-painted artisans. Their Albert XI series is a collaboration with Artkey that combines 3d printing, hand sculpting, casting, and painting. It is interesting to note that several popular makers started out making mixed media sculpts, including Binge from HungerWorkStudio (HWS), whose earliest work included hand sculpted and painted artisans.
Also included in this mixed media category is the concept of "Found Object" art. This is when a maker incorporates pre-existing objects into the sculpt. There is no hard and fast rule of how much portion of the sculpt constitutes found object art, but a good general rule of thumb is if the found components constitute more than 10% of the sculpt or is the primary focus of the sculpt, it would be included in this category. This would exclude sculpts that use small ball bearings as eyes, but include those that are predominantly made from third-party objects. Examples include Bro Caps early 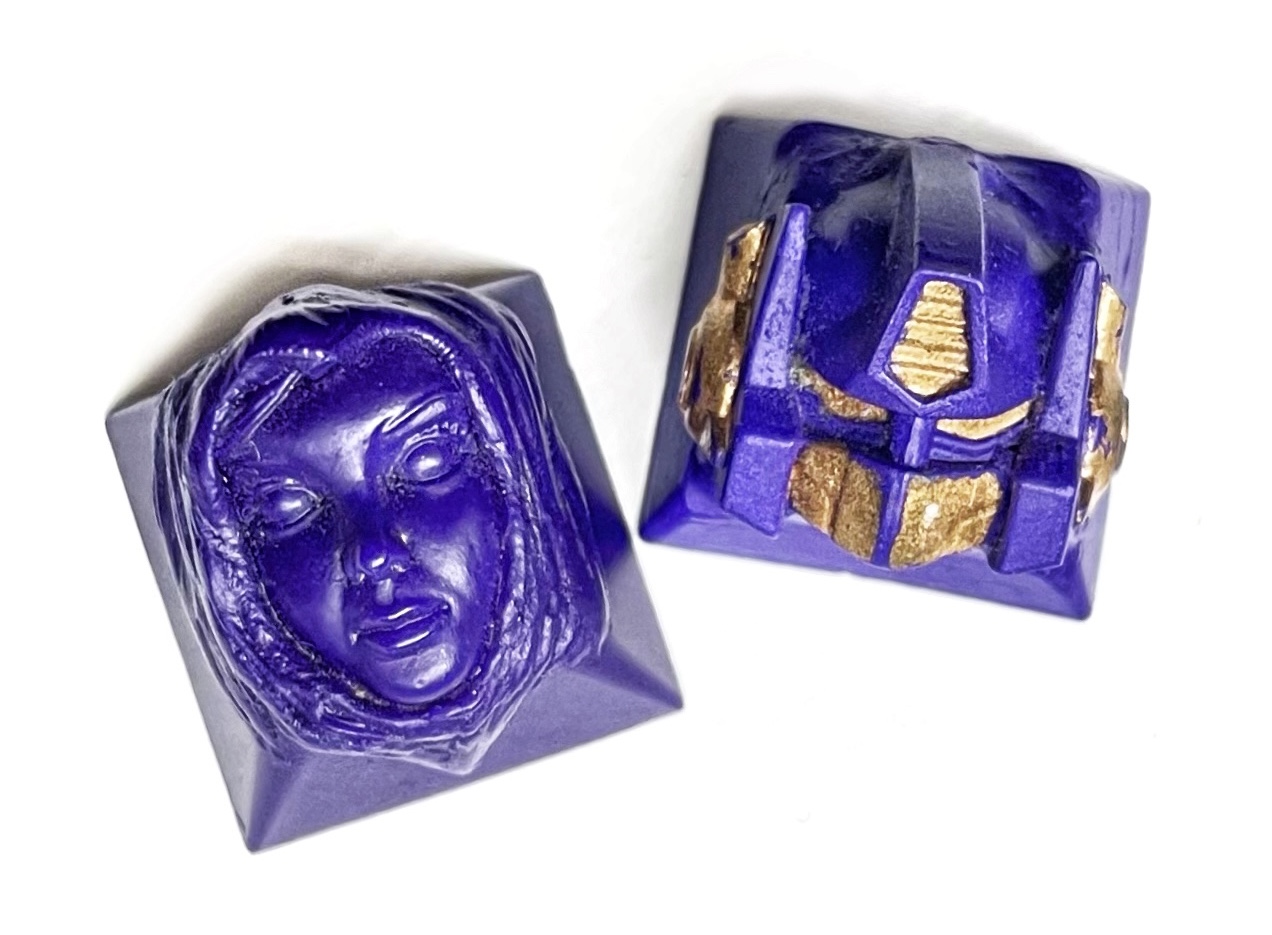 Brobot v1, which used a toy robot head (subsequent versions of Brobot evolved into an original design that became one of the most iconic artisans), and Killed by Kaps Conspire, which incorporated a doll head into a clay sculpt. Found objects may also be used in other mixed media categories, such as encapsulating a pre-made object into a blank.
Resin Cast Blanks
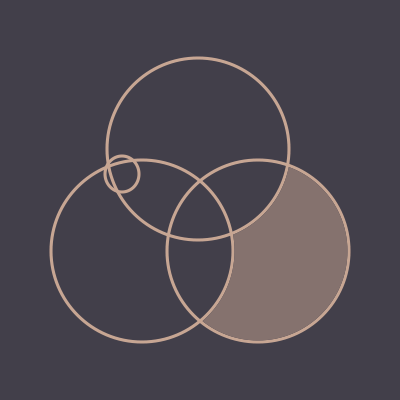 The third major category of artisans is resin cast blanks. These are artisans that conform to the exact or general profile and surface texture of a keycap, but made with resin, colorants, and other additives. Effects range from simple solid colors to sophisticated, multi-color designs. The common thread is that they are hand cast, match a keycap profile, and do not have sculpted surfaces. Some examples of resin cast artisan blanks are Latrialum's elaborate ink swirl with gold leaf sets, and Mitchcapped's custom Topre sets.
Sculpted Blanks
 Another popular category is the intersection of hand sculpted artisans and resin cast blanks. These are sculpted artisans that more closely follows the shape and profile of a keycap than freeform sculpts. They are typically made either by adding clay media to an existing keycap (additive), or sculpted by removing material from keycap shaped clay base (negative), or a combination of both.
 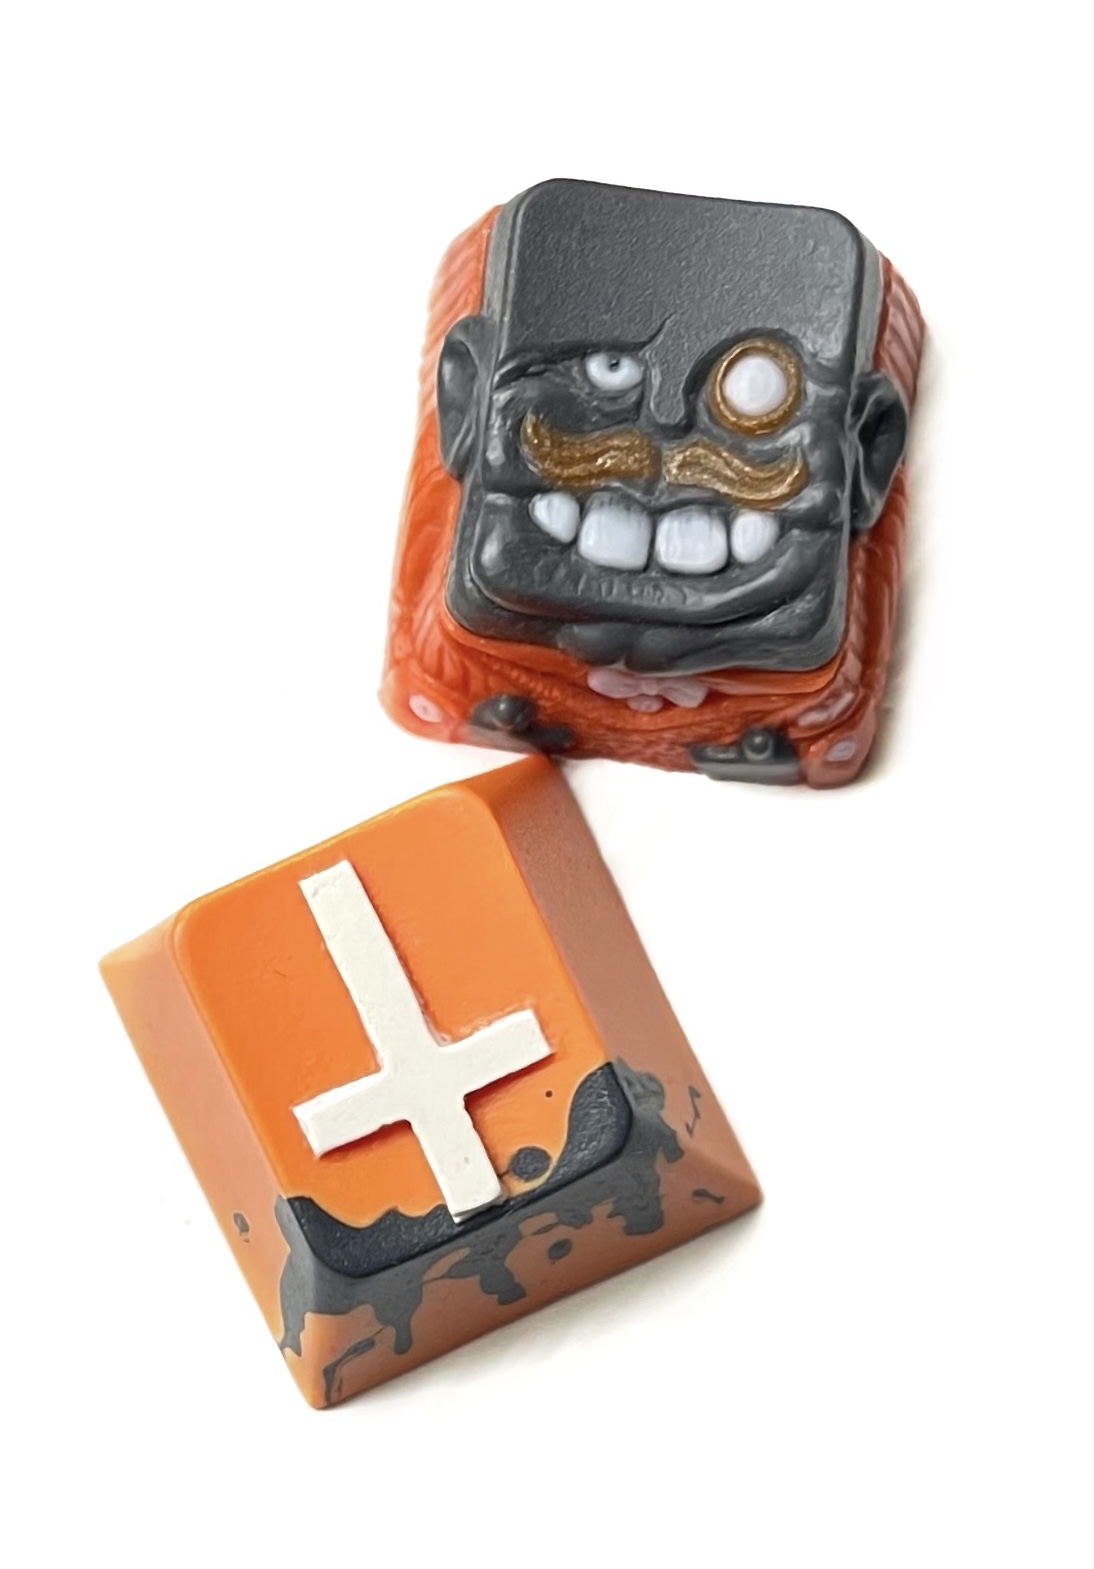 These tend to be popular because they show off the sculpting and casting skills of the maker just like any other hand sculpted and resin cast artisan, but conform closer to a keycap profile and fit well on a keyboard without looking too extravagant or elaborate. One of the best examples of a sculpted blank artisan is the HWS Earl, which manages to fit a complete character with face on top, and draped with clothes around the sides, all on a cap that fits perfectly next to a Cherry or OEM row 1 cap. Another example is the Deathcaps Cross cap, with a simple inverted cross shape that the maker has cast into hundreds of interesting colorways.
Mixed Media Blanks
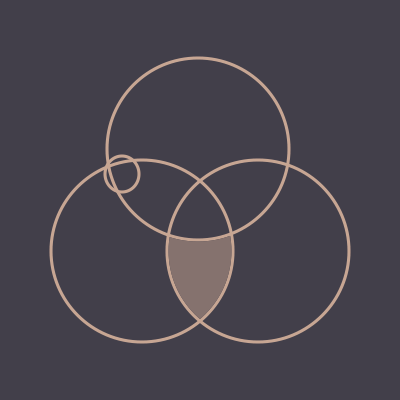 The final category lies at the intersection of 3D sculpted, hand painted caps and resin cast blanks. These are artisan blanks that are made from some combination of 3D printed or casts of actual blanks, with resin cast or painted colors. They may also include other pre-made found objects or be made partially or completely from non-resin materials such as wood or metal. A popular example of a mixed media artisan blank are the brass or aluminum artisan blanks from RAMA WORKS, which are machined and sometimes include enamel infill. Other examples are hand painted blanks from older makers like Hypnocaps, although hand painted blanks are rarely made these days.
Discover Makers and their Sculpts
Before you venture too far into purchasing artisans, it is a good idea to spend some time learning about the makers, past and present, and discovering their corresponding sculpting and casting styles, to see what suits your tastes. The good news for those of you who are joining the hobby after this site is launched, is that there are more maker and sculpt choices than ever before, to appeal to almost any art style preference.
The taxonomy of how makers and sculpts are organized is pretty straightforward:
- Maker: the brand that sells the keycap, sometimes used interchangeably with the username of the main artist (eg. Nightcaps/ETF)
- Sculpt (version): the name of the sculpt, which may include a version number if multiple iterations have been released
- Colorway: the name that describes a color design variant that is produced of the sculpt. A colorway may be as few as one instance of the sculpt, or hundreds, as in the case of a fulfillment or group buy colorway where many are produced. The notation "1/[number produced]" is sometimes listed next to the colorway in parenthesis to denote how many were made. A unique artisan where only one of a colorway was produced would be a 1/1 artisan.
While there is no exhaustive and perfectly accurate catalog of all artisan keycaps, the following resources are good places to start discovering artisan keycap makers and learning about their sculpts...
Where to Discover Artisan Makers and Sculpts
keycap.info
keycap-archivist.com
artisancollector.com
geehack.org
#artisankeycaps
/r/artisanmacro
Do's and Dont's for Hobbyists Starting Out
If you're new to the hobby and you've read this far, you're probably itching to buy your first artisan. If you don't have time to read the other guides before embarking on that journey, here are a few quick tips to consider, and things to avoid if you can...
| Do's | Don'ts |
|---|---|
|
|

