Mousy’s Artisan Keycap Photo Projects
Mousy's Artisan Keycap Photo Projects
Author: Mousy
Published: October 16, 2022 Entry for Artisan Collector Writing Contest 2022

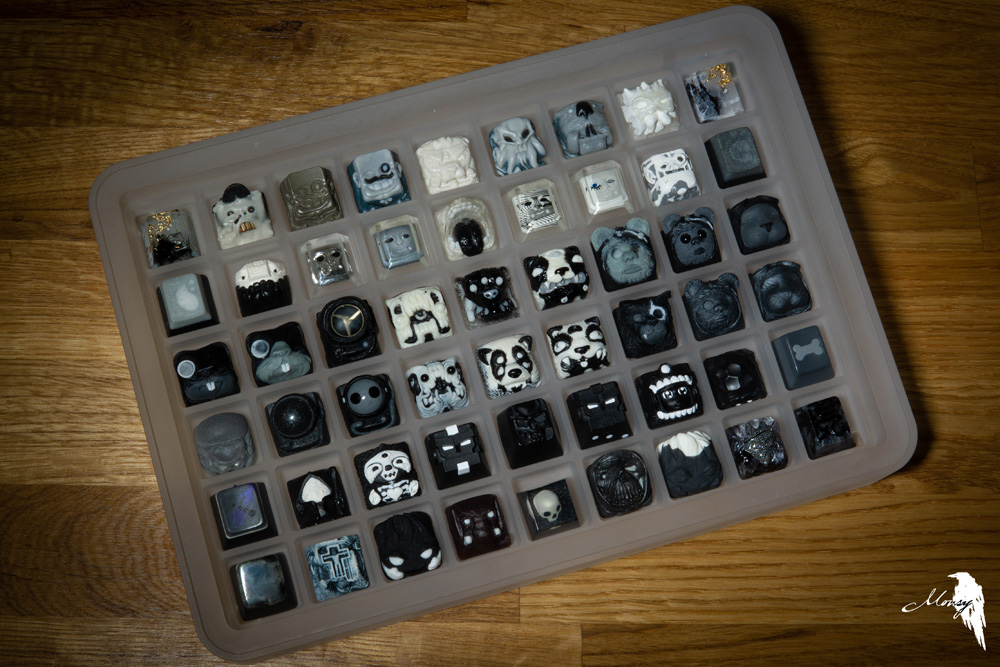
Most of you know me as Mousy and I have been involved with the community and hobby - some may call it an addiction - for nearly 5 years now. I was instantly hooked on the amazing creativity and concept of handmade sculptures for my keyboard from the get go.
The thing that was immediately apparent to me was the limited availability of the items in a hobby such as this. Not everyone would have the means, luck, or ability to see first hand the work and talent the makers put into their artisan keycaps.
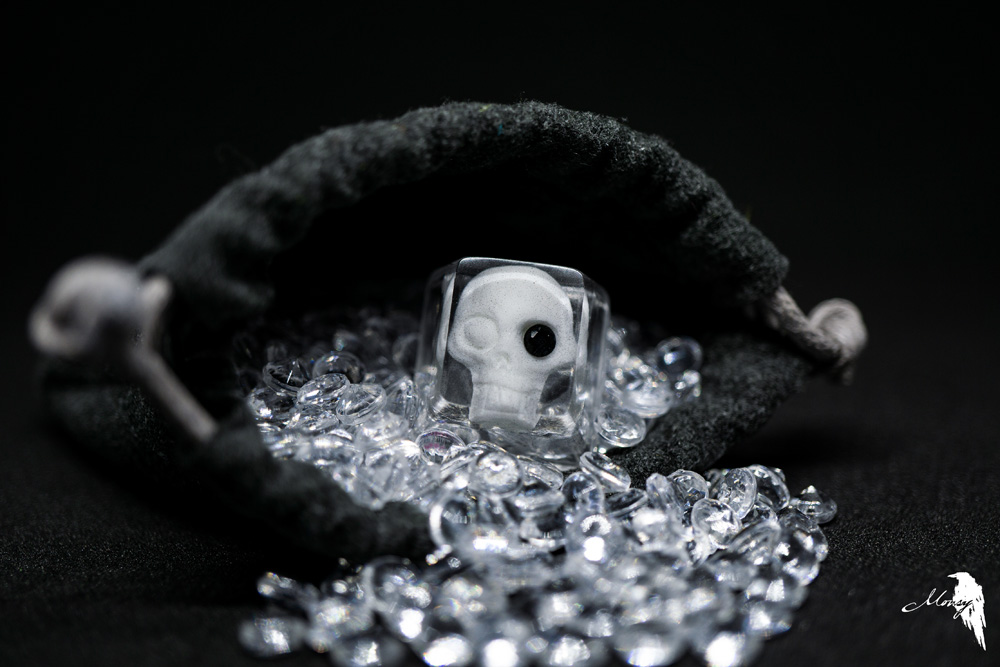
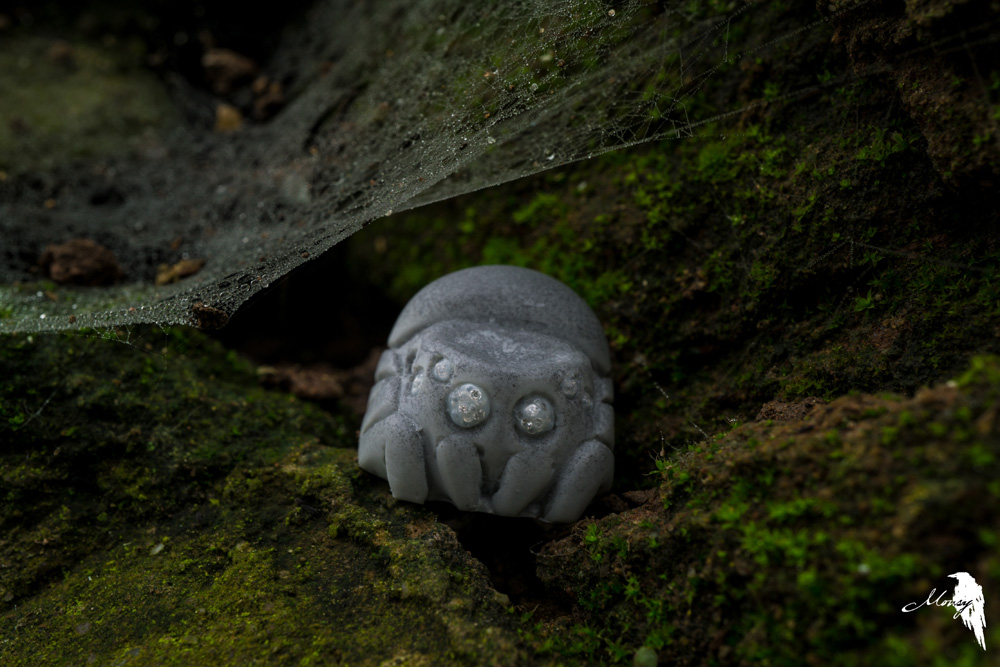
The best way I could think of to counter this was to showcase and photograph the artisans I had managed to collect myself in unique and interesting ways so they could be enjoyed by anyone. It was this that sparked my interest in photography and led me down the path of getting my first camera and starting a project to do two unique artisan photographs a week for an entire year.Equipment and Essentials
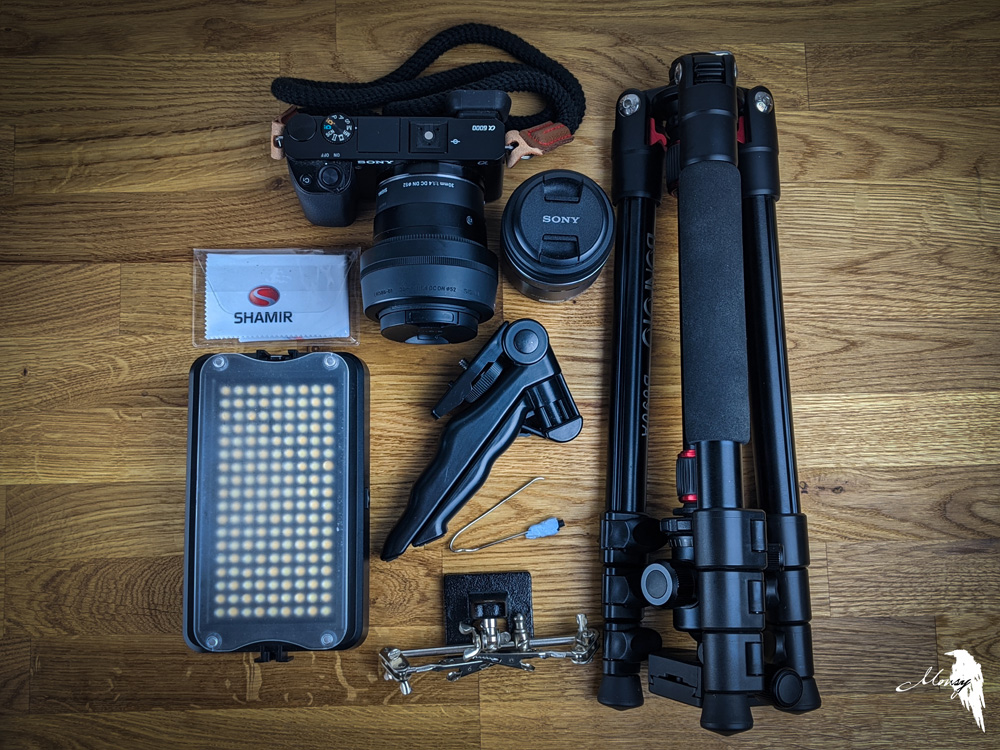
Over my time taking macro artisan photographs I have put together a list of equipment and useful bits that are instrumental in my process.
Camera:
- The camera I use is a Sony a6000 but when I first started I was using my phone with a clip-on macro lens. So don’t feel disheartened if you don’t have a camera right away!
- Set your camera to manual. You will thank me in the long run I promise. I had no prior experience when I got my Sony and the learning curve was pretty brutal going straight into manual but I am so grateful as I learnt so much because of it.
Macro Lens / Extension Tubes:
- Both a dedicated Macro lens and Extension tubes are valid options depending on your budget. I personally prefer the lens due to ease of use and have used the Sony 30mm F3.5 Macro for the majority of my photographs.
Tripod:
- Tripods are essential for macro photography as any slight movement during the exposure is immediately apparent. I have both a large tripod I mostly use indoors and several small ones that are either used for lighting or for the camera. These are great for outdoor shoots.
Mini LED Panel:
- Lighting is key when it comes to getting a good photograph. Indoors is where you will have the most control however outdoors is where you get the best and most natural light. I have two small LED panels with brightness and temperature control which allow me to create the desired look.
Lens Cleaning Cloths:
- Always handy to have some cloths for cleaning lenses or other surfaces, especially if you’re outdoors.
Switch Stems and Bluetack:
- This combination is a must have for positioning artisans both indoors and outdoors and is something I use in every photograph. Lifting the artisan slightly off the ground or propping it up slightly helps create depth and character.
Large Paper Clips and Weighted Specimen Holder:
- These two are the unsung heroes of many of my photographs. Having the ability to suspend artisans or hold them perfectly still is invaluable especially when trying to achieve the floating or suspended effect.
Selection of Artisans:
- I would always have a selection of 4 or 5 different artisans in a range of colors as for the majority I only had a rough idea of what I wanted the final photograph to look like and having a variety with me allowed for impromptu and spontaneous compositions.
Props:
- I have used a huge variety of props, some by chance others made specifically for the photo. These have ranged from glitter filled capsules for the Lucid Last Pilot to a cheese grater for an interesting lighting effect for a Black Pearl Reaper. With macro the weirdest items can become great backdrops for your photographs and the best way is to experiment.
Project #1: Nightcaps Surgical Shine Job Fugu
Ideation and Experiments
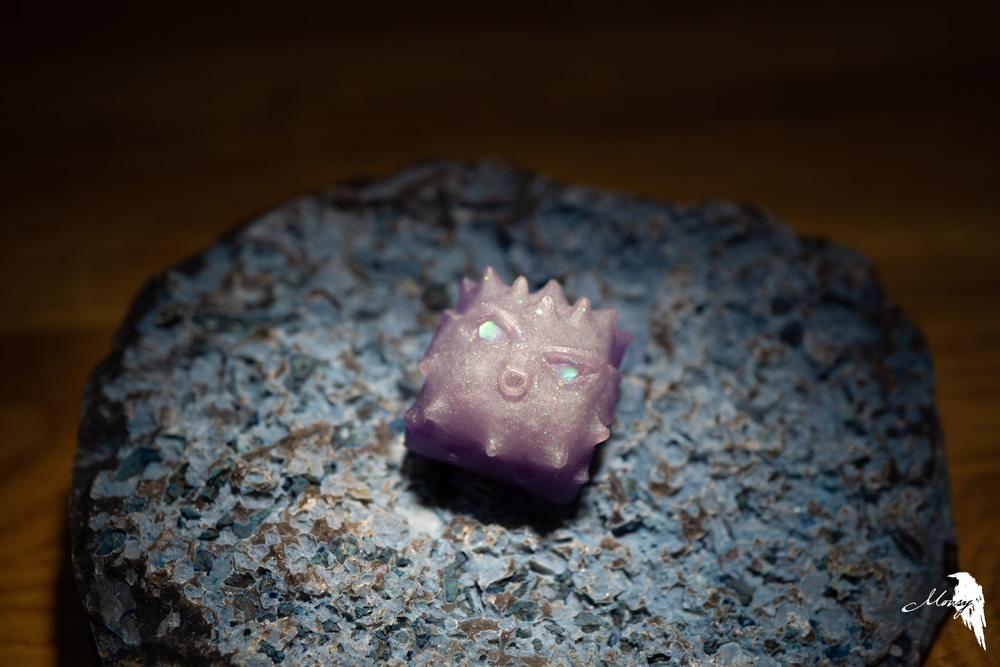
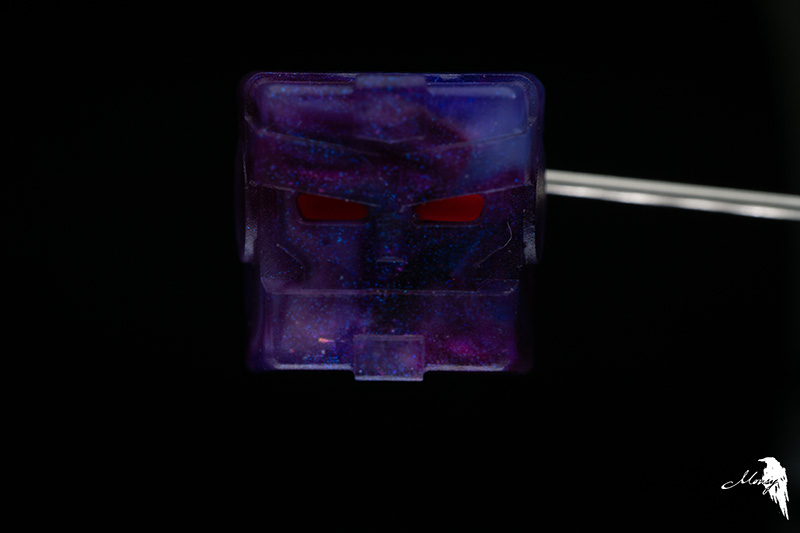
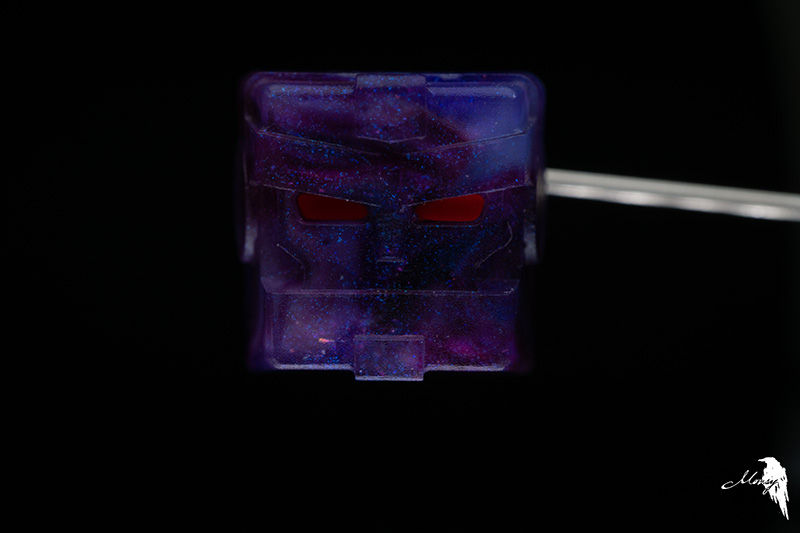
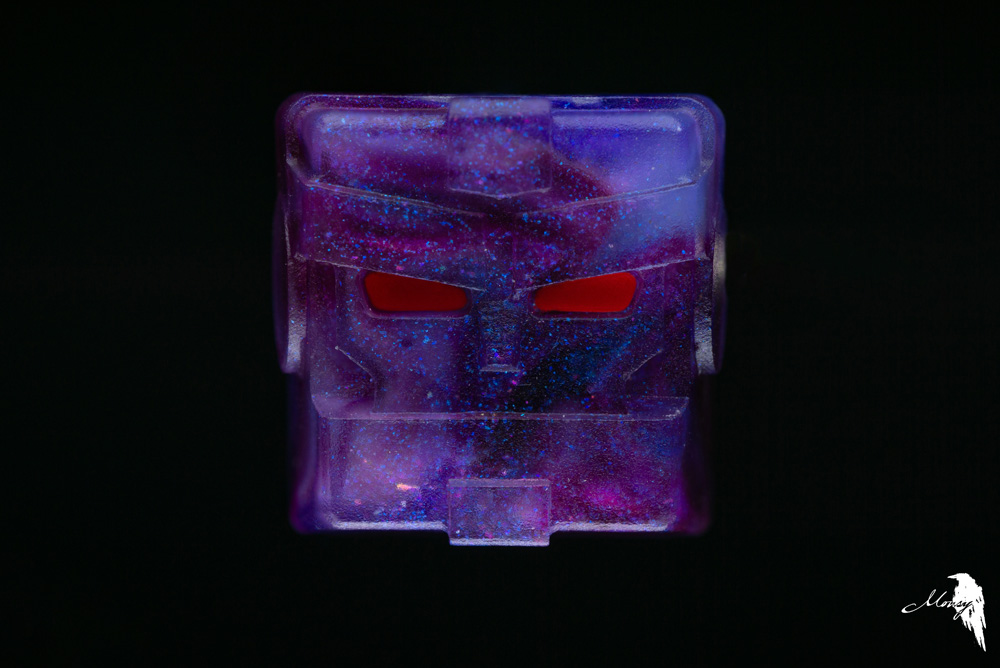
Once I have selected the artisan I am going to photograph, I try to theme the composition either around the sculpt or colorway to give it a cohesive feel. For the Surgical Shine Job (SSJ) I knew I wanted to have the focus of the composition be the eyes of the artisan because of their distinct and unique effect however I also wanted to try and tie in the sculpt.
To get the eye effect to show the light needed to be very specific which made me think of the underwater photographs where a beam of light is going all the way to the sea bed illuminating a single object. This would tie in both of my key themes, however due to the size of an artisan I knew I couldn’t just use one of my LED panels as a direct light source from above and would need a more focused narrow beam of light.
Setup and Testing
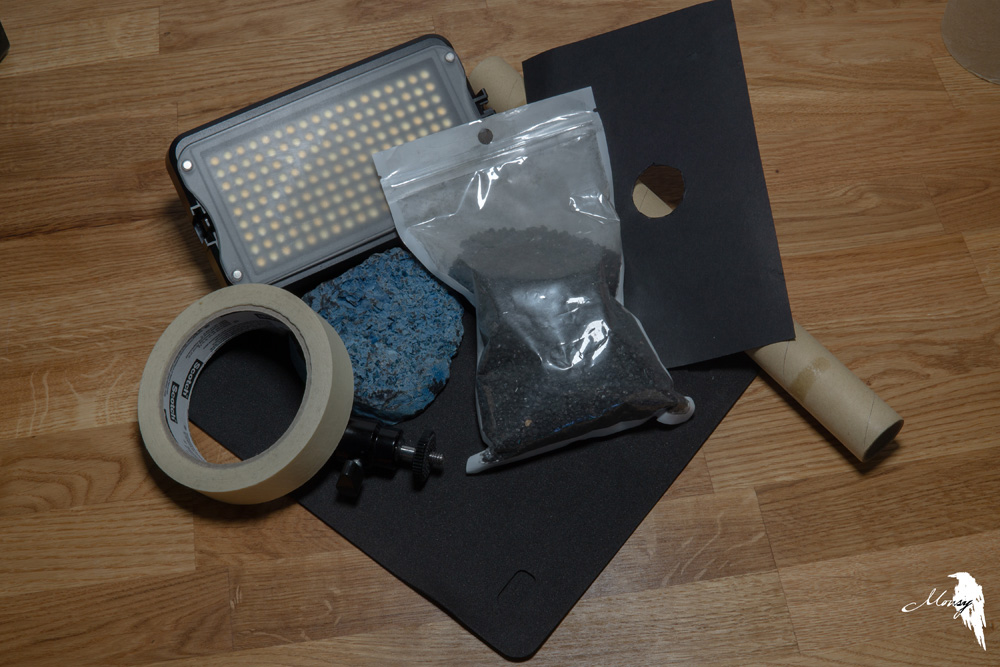
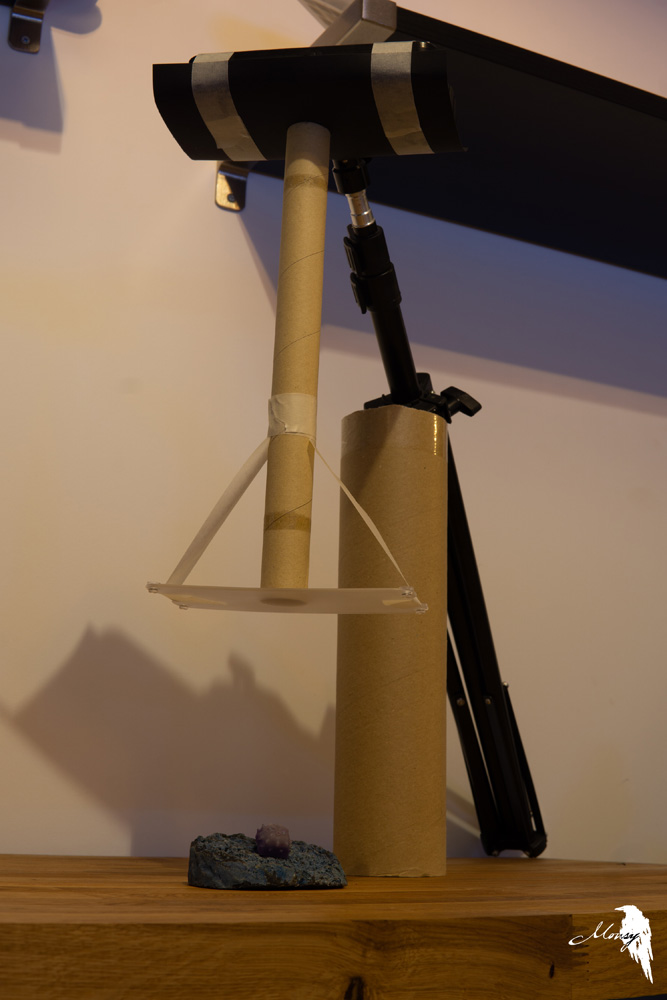
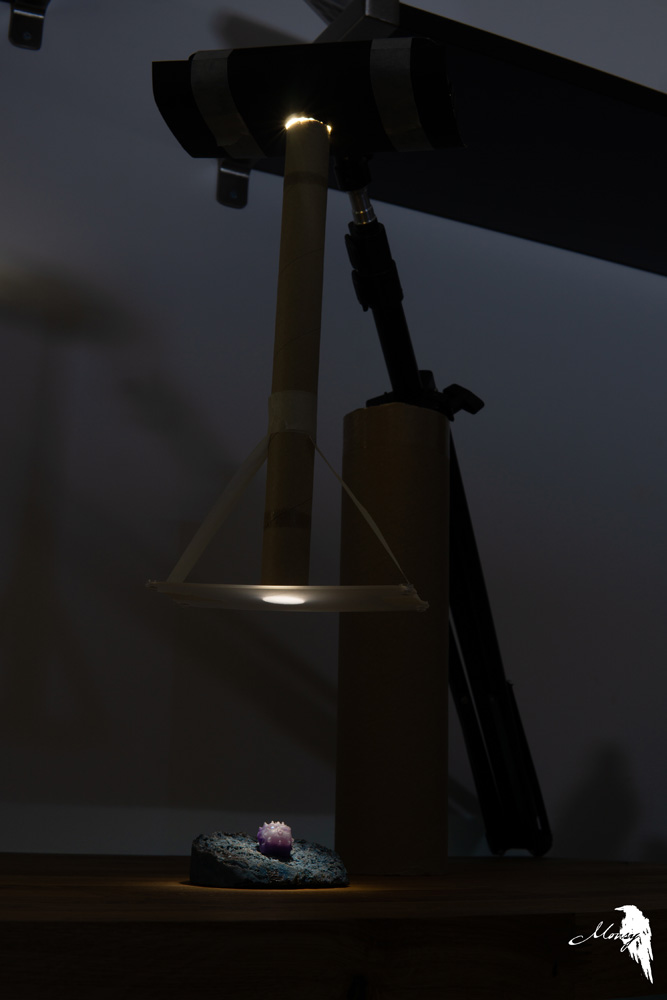
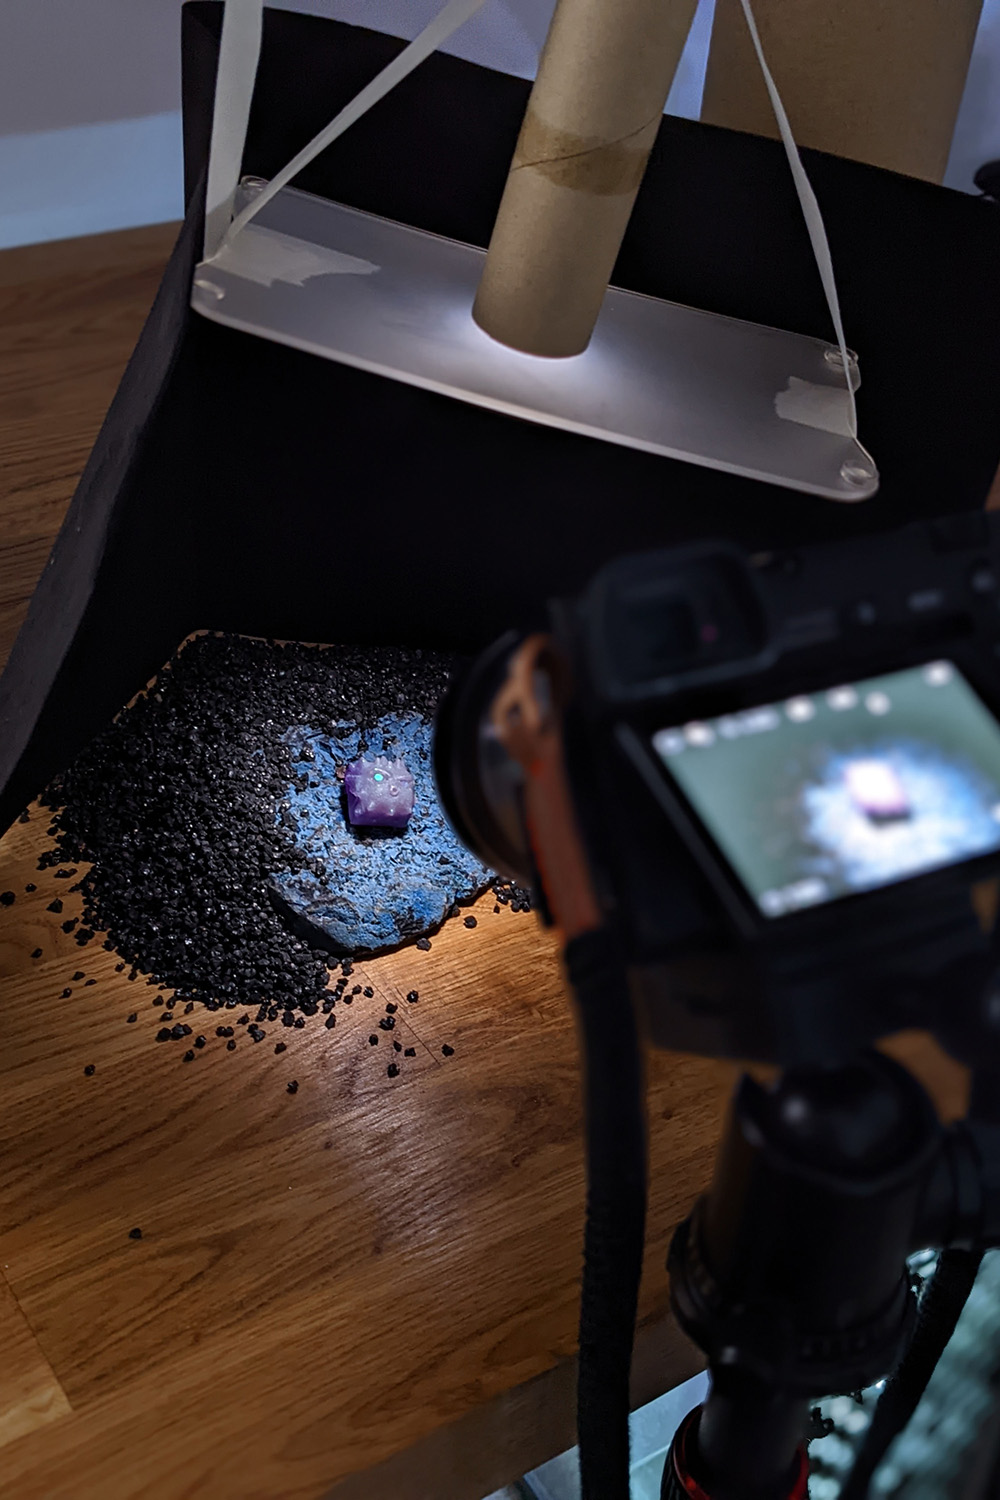
Knowing that I needed to channel the light from the LED into a narrow beam, I put together a cardboard tube and some black card to create the desired effect. (Editor's Note: this type of lighting modifier is known as a "snoot".) The card was to block all the LEDs that weren’t directly above the tube and allow just a single circle of light to be allowed through.
Without the tube the light would have spread far too much by the time it got to the artisan removing the effect I wanted. I also re-attached the acrylic diffusion panel to the bottom of the tube which softened the light circle from a sharp edge to a soft one.
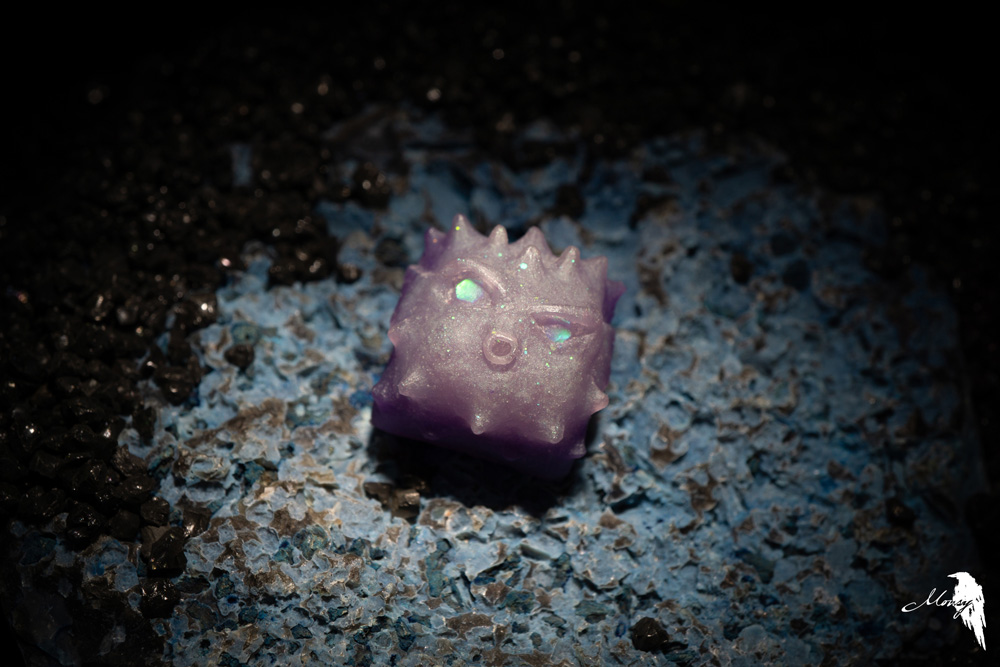
I had already found and selected what I wanted the artisan to sit on, as the texture and look was very fitting with the ocean floor theme I was trying to achieve. However I knew that I would still get some of my desk in the background and didn’t want to hide that with pure shadow. I tried a few ideas but settled upon using black gravel for a fish tank as it's coarse enough to give a nice texture and would mesh well with the main rock.
Getting the Shot
Once I was happy with the composition of the photo I needed to make sure that everything I wanted in focus was in focus and that the lighting was how I envisioned the final photograph to be. I always try to do as little alterations especially to color in post as possible as I want people to see the artisan as true to in person as it can be.
No matter the photograph or composition, the biggest thing with macro photography is to use a time delayed shutter to remove any and all vibrations as these will show up tenfold in the final photo due to the magnification and detail. I also nearly always take several photographs with varying apertures so that I can make sure everything I want in focus is.
Post Processing
Once I am satisfied I got the photograph I always start with taking all the photos into Lightroom Classic and then the final one into Photoshop. They’ve been the software I have always used but there are other great pieces of software out there. As I always shoot in RAW, Lightroom offers the best control over the settings than moving straight into Photoshop.
I usually at this point have an idea which of the photographs is going to be the final one however I make sure to look through all of them as until I see them on a full sized screen, not just in the camera, I can’t say for certain which I will use.
My process once I have picked the photo is always the same as I found it allows me to have the best workflow.
Lightroom - Crop & Adjust
I would always recommend taking your photos wider than you want the final photograph to be as you can always crop in but you can’t zoom out after the fact. I will also straighten / rotate as needed at this stage as well.
Lightroom - Light & Style
a. Light is probably the most important part of a macro photograph and so is always the first ‘edit’ that I make beyond the initial finalization of the composition.
b. You will find you develop your own style when it comes to this however for me I nearly always use a vignette as having a darker border to the photo draws your eye into the center where the focus of the photo is.
c. As I mentioned above I always want the final photograph to be as close to what I see in person as I can. I will always have the composition still set up next to me if possible so I can refer to it and make sure that I am keeping true to it.
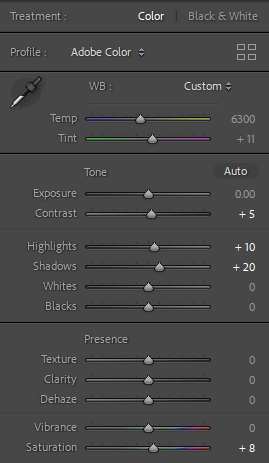
d. In this case I increased the Contrast slightly to give more distinction between where elements started and ended as well as brightening both the Highlights and Shadows to lift them both up while maintaining the lighting effect for the image.
Lightroom - Color
It is extremely tempting to crank all the colors up to make everything extremely vibrant but 9 times out of 10 that isn’t what it would look like in person so I try and avoid editing these as much as I can. Little is always better and in this case I only slightly increased the saturation to counter the white light slightly washing out the purples from the artisan.
Photoshop - Minor touch-ups
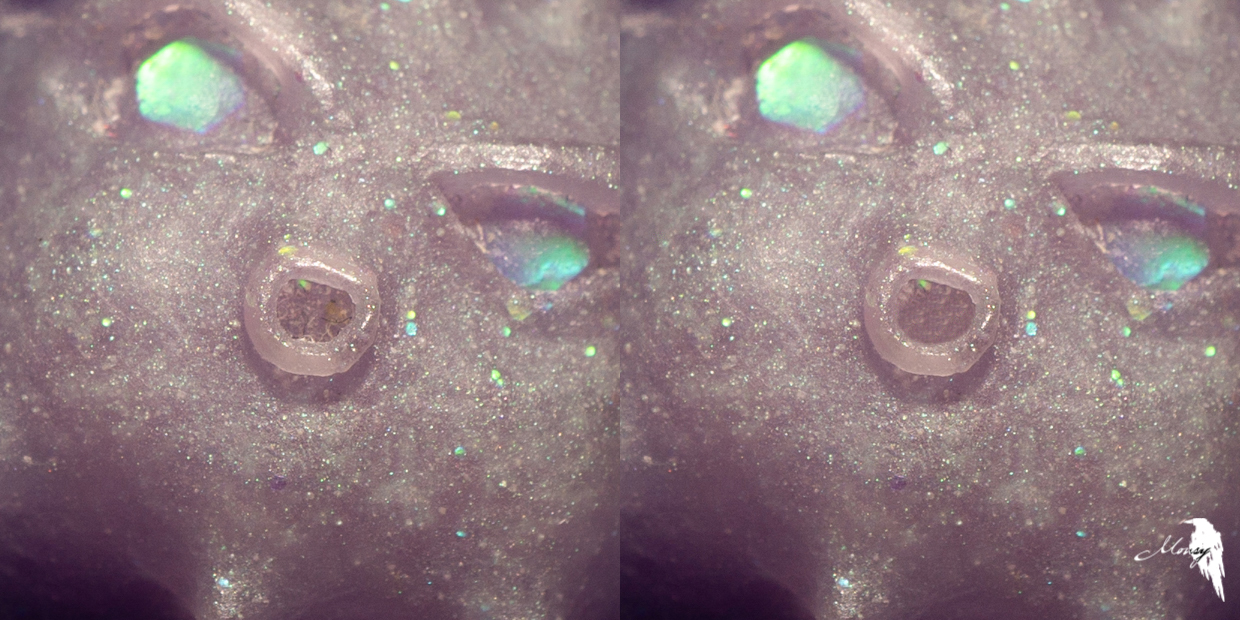
a, The final step for me is always to take the exported photograph from Lightroom and give it a checkover in Photoshop. No matter how well you cleaned the artisan before starting you will always find a small speck of dust or stray hair. My goal is not to cover up defects but to make sure there is nothing extra taking away from the overall image.
Before and After Editing
b. The majority of this work is done through the Spot Healing tool or the Clone Stamp tool. The majority of the time you won’t notice the difference unless you see them side by side.
c. In this case the only changes were to remove some dust from inside the mouth as this is notoriously hard to clean out without risking damage.
The final photograph achieves everything I had set out to during my ideation and experiments with the lighting and theme drawing the viewer’s attention to the eyes and their unique effect.
Project #2: Focus Stacking Macros
What and Why?
Focus Stacking is a post processing technique where you combine multiple images allowing you to get a far greater depth of field than you would be able to with a single image. Translated it means you can have every element of the subject, in this case an artisan, entirely in focus while retaining a strong depth of field with the rest of the composition.
I have used this technique in many of my photographs using two different methods to achieve it. The first by manually altering the focal point within the photograph, getting separate photographs of each part and the second by using an application within my camera to automatically refocus and take multiple images at each focal depth.
How
The main difference between the two methods I have used is how the images are captured. The first and easiest method as I mentioned is to move the focal point of the camera to different positions on the artisan. This is a great start to learning the technique and can still produce the same quality of photograph as using an automated method. The key to it is to keep the camera perfectly still between photographs and so a tripod is highly recommended. If there is some movement it is okay as you can see in the first example.
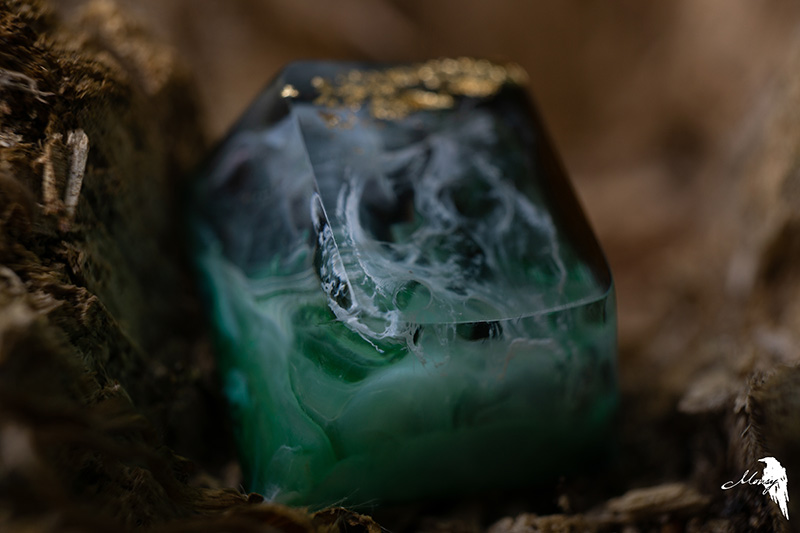
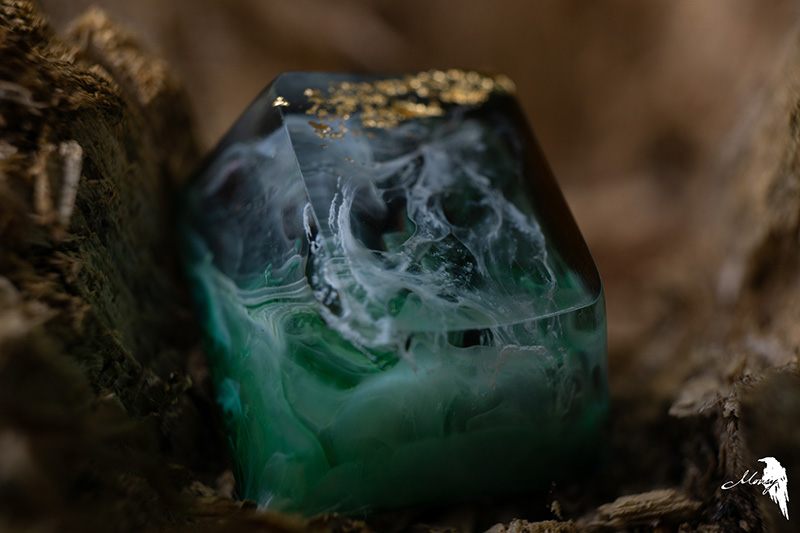
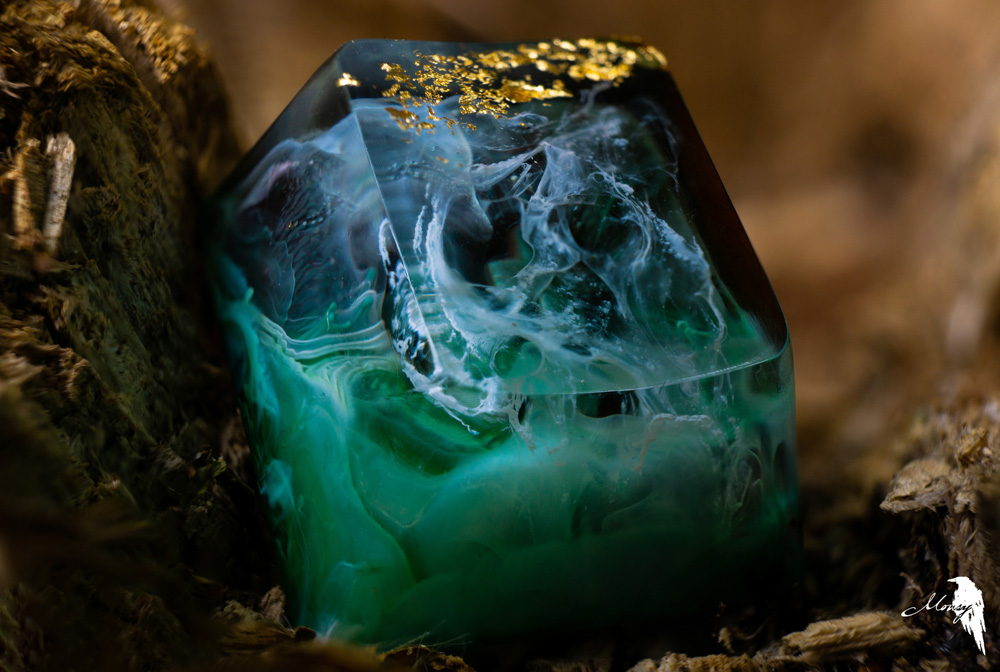
To demonstrate this first technique I have the Royal Ganja blank by Latrialum which I shot on a walk. This style of artisan heavily favors this technique due to the complex detail throughout the entire piece. You can see from each photo the focus point moving back through the artisan and a different portion of it is in focus while everything else is blurred with a really rich depth of field. You will also notice a slight movement between each photograph as due to the composition I was unable to use a tripod however this can be fixed in software.
As the software side is the same for both methods, I will quickly talk about the second method of taking the photographs to stack. Within my camera settings I have the ability to set it to do a series of photographs at different focal depths automatically. This is effectively the same as the manual method however you can get much more control and reduce the risk of not getting it all in focus.
As an example of this are the photographs I took for the Plushberry Bro Bot which also demonstrate the use of the floating effect achieved through the use of the weighted specimen holder, a paperclip and some bluetack.
Once you have your photos my process to edit them is very similar to that of a normal photograph with the exception that I am working on anything from 3 photos in these examples up to 20 and a slight change in the order I do the steps.
Lightroom - Light, Style & Color:
a. Instead of starting with cropping and adjustments to the photo I will identify the photograph out of my set with the most of the subject in focus and this is the one I will work on for my edit. My objective remains the same as all my other photographs to bring the image back as close as I can to what I see in person.
b. For the Royal Ganja blank I had minor edits to make with the focus being on bringing back the vibrancy that was lost due to the day being overcast.
c. For the Plushberry the main edit was to increase the exposure and reduce the shadows that had been created by my attempts to blackout the entire background in shadow.
Photoshop - Stacking:
a. Once I have my corrected images out of Lightroom the next step is to combine them all together into one image. I do this before doing any further editing as editing one stacked image is much easier than editing 20 separate images.
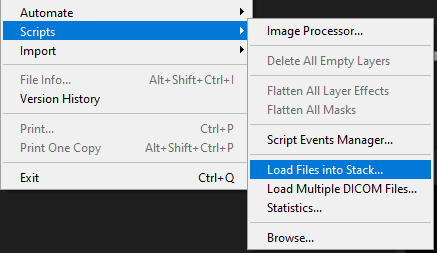
b, Photoshop has inbuilt functionality to help you with the focus stacking and is as follows:
Navigate to: File > Scripts > Load Files into Stack
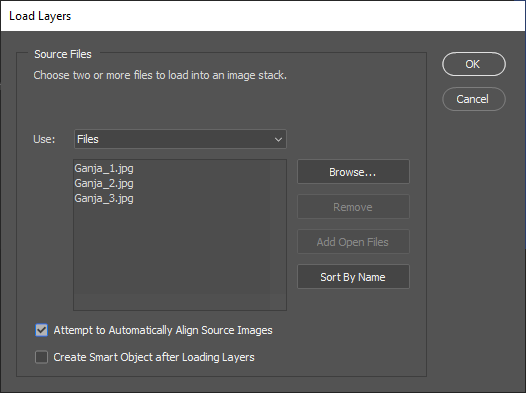
Select all your exported photographs and make sure to tick the box for automatically aligning the source images:
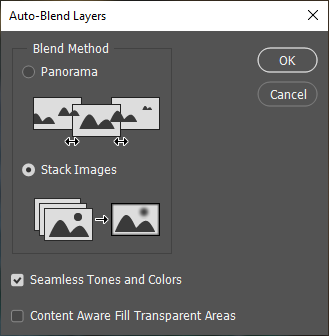
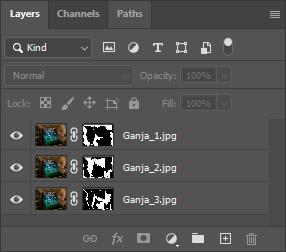
Once all the photographs are loaded you should see them all in the layers section. To now combine them you need to select them all and then navigate to Edit > Auto-Blend Layers and select the Stack Images option and personally untick the Content Aware box. Depending on your PC and quantity of images this might take a little bit to process.
Once this is done you will notice that each layer has its own mask and you will have a new composite image with elements from each of your photographs.
Photoshop - Cropping & Touch-ups:
a. Once the images are stacked I find it easier to merge the layers all into one so I am working on a single image for any touch-ups and to crop down to the final photograph.
b. For the Royal Ganja blank I had very little to do after the photographs were stacked beyond being cropped to center the artisan in the frame.
c. The Plushberry required a bit more work in addition to being cropped as the paperclip that was used to suspend it was still visible. This is easily removed by using the lasso select tool to draw around the paperclip and using the Content Aware Fill. This isn’t perfect when it gets near to other objects but that can be tidied up with either the Spot Heal Brush or the Clone Stamp Tool.
The finished product from a focus stacked image is something that is impossible to do in a single image and can create some of the most detailed and visually engaging photographs. The time it takes is worth it when you are able to capture every single little detail.
Project #3: Full Keyboard Photoshoot
Ideation and Experiments
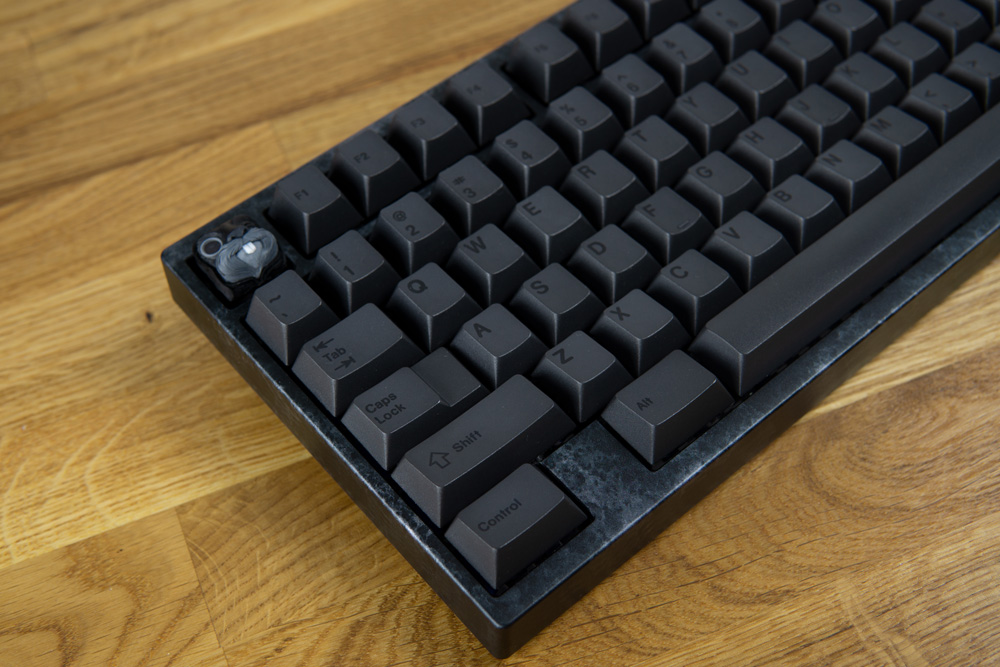
For this project I knew that I wouldn’t be able to just do macro photographs due to the size of the keyboard, so I opted to use a 30mm F1.4 Sigma lens. This is an extremely versatile and well rounded lens that I have used for any larger composition photographs.
My focus for the photographs was to showcase the intricacies of the anodisation and design work so I needed to find a background that would compliment without taking away from the keyboard.
Thankfully I have a hardwood desk which would add some nice texture and character to the background while not taking away or distracting from the main subject. I was also conscious that the keyboard being purely monochrome (it’s me what else would it be!), I wanted some color to avoid the photographs feeling washed out or cold.
Setup and Testing
For a full keyboard the LED panels that I have wouldn’t be able to provide suitable lighting due to their size and how harsh they are. So because of this I opted to use two large softbox lights that I have had for years. These were quite inexpensive and don’t have any brightness or temperature controls like the LED panels do, however they create a really smooth and uniform lighting effect which is what I wanted for the photographs.
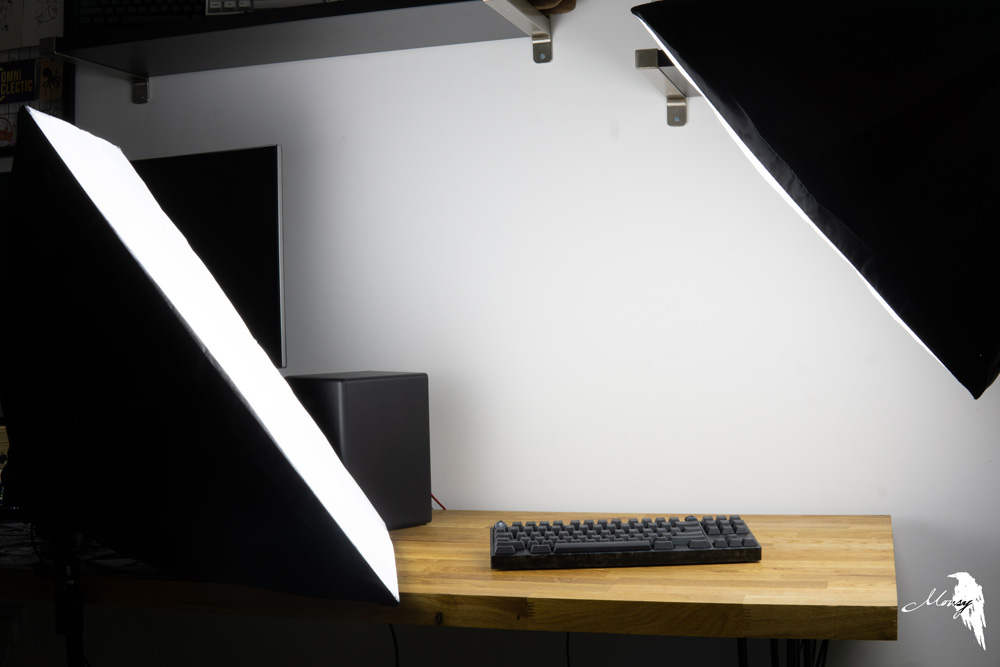
The aesthetic of the lighting for these photographs I was trying to achieve was to create definition and depth through shadows but not hide any elements of the build. After trying several different configurations of the two softboxes and seeing what created the look I wanted I settled on the following configuration of lights.
The left-hand softbox which is angled upwards is the main light illuminating the keyboard and creating a sense of depth by casting shadows between all the keycaps while being bright enough to showcase the intricate finish the case has. The right-hand softbox is to provide the exact opposite however due to it being further away and being set to a lower power it isn't bright enough to remove the shadows created by the other softbox but is bright enough to allow you to see the details and keyset legend. This is more commonly referred to as a fill light and the left softbox would be called the primary key light.
Getting the Shot
After the lights were set up and I was happy with how the shot looked in the camera I gave the entire keyboard a final once over with a cloth to remove any fingerprints or dust from moving it around and setting up the lights. Prior to this I had already taken it completely apart and cleaned the case and keyset as I can promise you it's quicker than removing it all in Photoshop!
I will only be breaking down one of the photographs I took of the Jane for sake of brevity but will be talking about the main reveal photograph which will be the first people see. For any ‘cover’ picture there are a few things that I want to achieve. I want the subject to be clearly visible and showing the best side or section of itself and most importantly I want it to catch a viewer's eye and make them want to see more.
To achieve all of this I decided to focus on the left half of the keyboard as it reveals enough of the entire keyboard while maintaining a slight feeling of mystery to what the other half looks like. No one part of the keyboard is more present than others giving the overall feel that it's the keyboard as a whole that is the subject, not a specific element which allows for further photographs to highlight individual elements without feeling repetitive.
Post Processing
In truth there was very little work done to the Jane photographs due to the time spent working on the lighting setup and cleaning, this doesn’t mean the changes weren’t important but shows that if you put the time in when taking the photograph initially it can save you a lot of time in post.
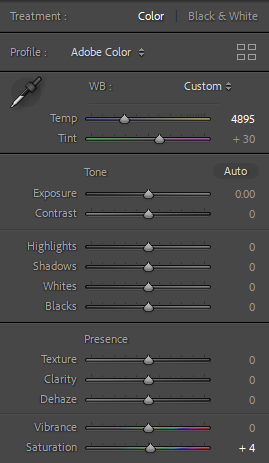
a. As I mentioned there was very little I felt that I needed to do to these photographs beyond a slight boost in the saturation as the two softboxes don’t have a light temperature control; they are very white and wash out colors.
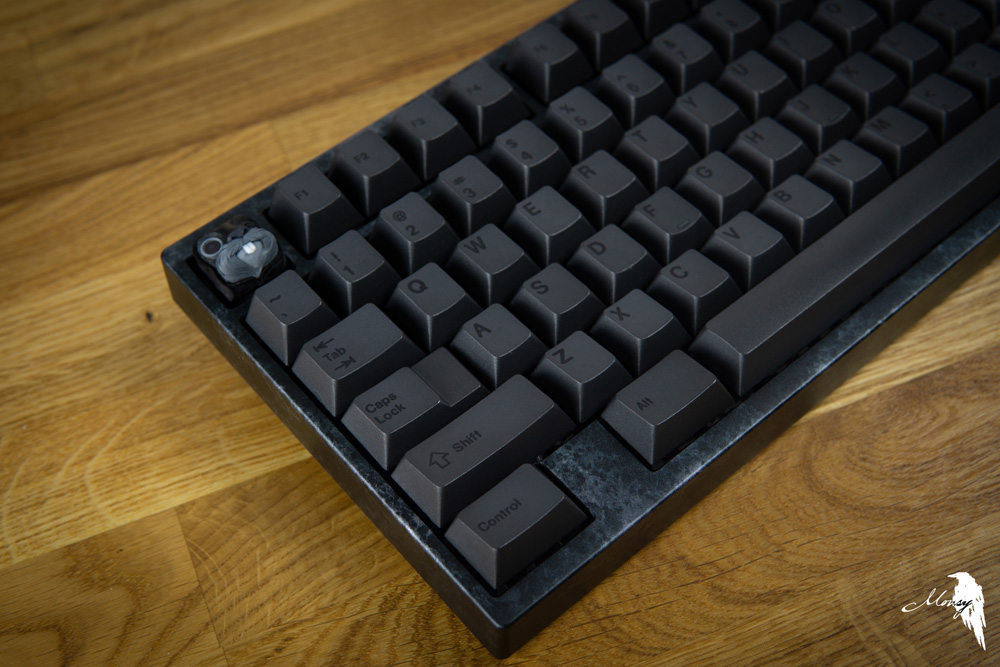
b. The only other edit I applied at this stage was a vignette around the photograph. This is a very core part of my style of editing and photography that I feel adds to the overall aesthetic by drawing the viewers focus into the center of the photograph.
c. One thing to keep in mind when doing sets of photographs such as these is you want to keep a cohesive style and aesthetic through all of them. You don’t want them to look like they were taken at different times or in different conditions.
a. Even after all the cleaning and care taken there is nearly a guarantee that you will still need to remove some dust or a fingerprint. Thankfully it was a minimal amount as I can promise you a macro lens will make every single spec very very obvious!
I feel the final photograph speaks for itself and fits all the criteria I mentioned above for a cover photograph for a project such as this. I feel this photograph of mine was going to demonstrate that you don’t need to add lots of effects or editing to end up with a very professional looking photograph
Closing Thoughts
I want to firstly say thank you to rmendis for allowing me to share my less than conventional and somewhat janky methods and techniques for taking photographs, and secondly to you for reading through it all I hope you found it somewhat informative. The biggest bits of advice I can give are:
- Always take more photographs than you think you will need. For every one photograph I publish there are probably 5 others that are archived.
- If you are able, always keep the composition setup until you have checked the photographs on your computer.
- Have fun and experiment with things you have around you. Some of my favorite photographs have come from me messing around with ideas so don't be afraid to just give it a go!

